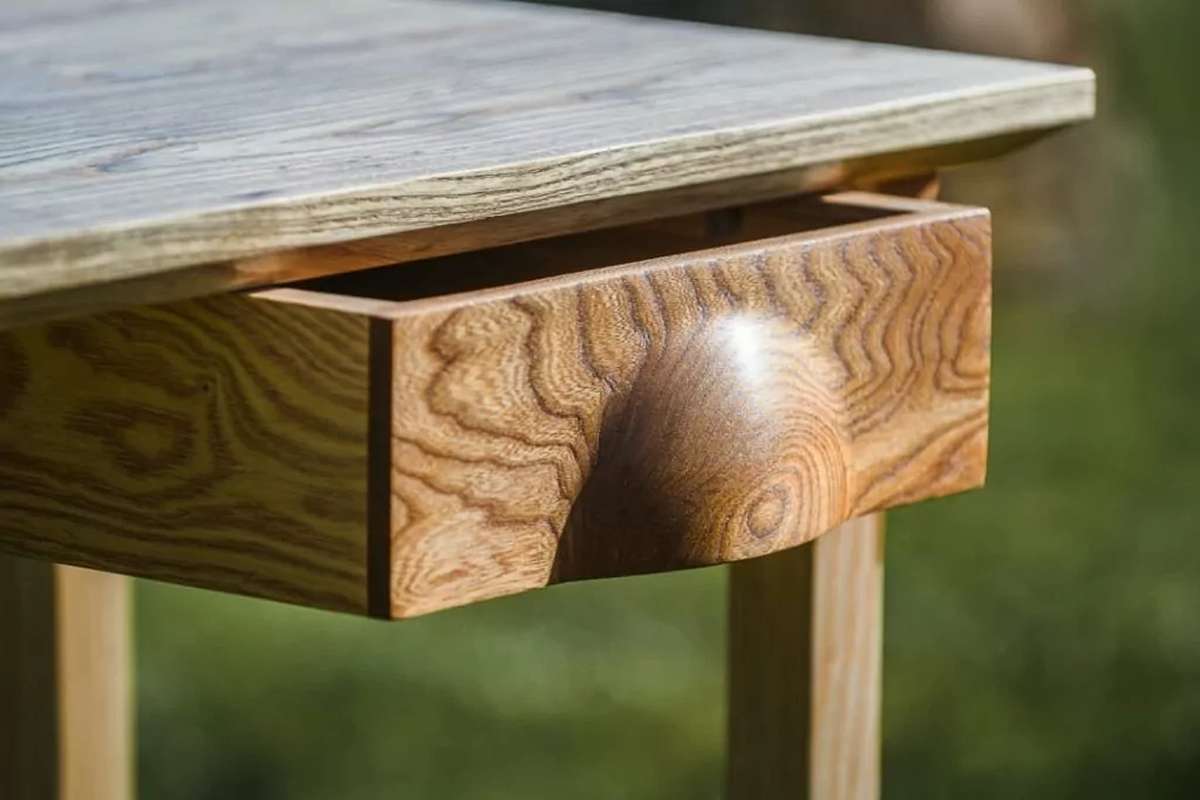
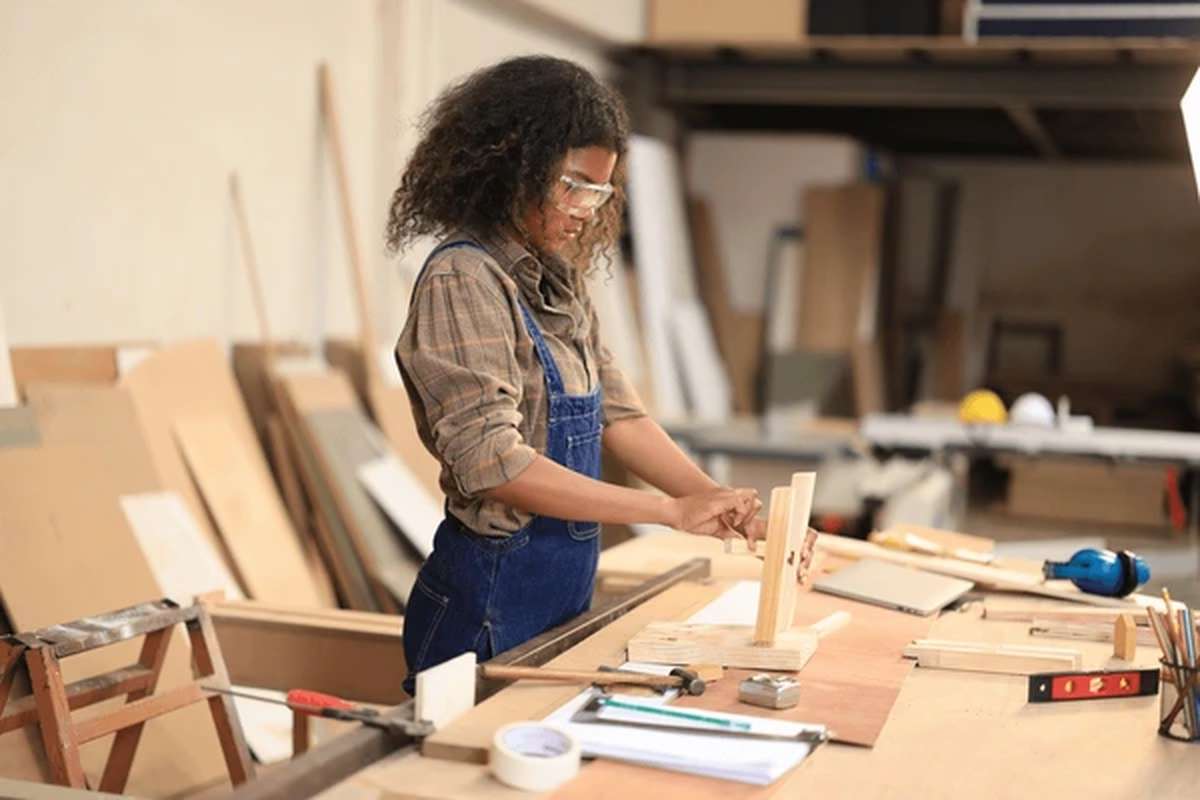
Receiving the beautiful oak from Epping Forest this week brought immense excitement to the workshop. The grain pattern on this oak, a direct result of the conservation work at Epping Forest, was simply stunning.
Last year, Epping Forest, represented by John, the Senior Ranger, approached our workshop. They wanted to discuss the creation of a Keepsake Box for Alice, a dedicated volunteer ranger, in recognition of her years of service to the conservation of Epping Forest. This box was to be crafted from oak sourced from the Forest, a byproduct of their ongoing conservation efforts.
Our discussions delved into the details of the commission, and John provided me with more insights into the conservation work conducted by his team. This fueled my curiosity, prompting a visit to the Forest with professional course trainees. John graciously guided us through the Forest, explaining the reinstated habitats that had brought back a myriad of birdlife, insects, and other flora and fauna, some absent for decades. It was a revelation – a serene oasis hidden next to busy city life, a sanctuary crucial for our well-being, especially in challenging times.
The arrival of Epping Forest Oak at the Artisan Woodworks Workshop marked an exhilarating day. Conservation efforts, including the felling of a small number of trees, provided an opportunity for bartering. A proposal was presented, resulting in an arrangement that included a couple of Epping Forest oak butts. A year and a half, one baby, and a pandemic later, John informed me that the sawyer was coming to mill some oak.
This event brought me immense joy – delivering completed projects to clients, especially witnessing their reactions, and a timber delivery are two things I thoroughly enjoy. John’s arrival at the workshop with the milled oak, accompanied by Alice, who received the commissioned box the previous year, was a delightful reunion. Meeting her in person and hearing her feedback on the keepsake box added a personal touch to the day.
If you’re intrigued by the conservation work, you can learn more about what the rangers at Epping Forest do here. The oak, milled into 50mm / 2-inch through and through slabs, will now go into the stick to initiate the seasoning process. The lingering question is: What piece of furniture will truly do justice to this oak? Chairs seem like a fitting choice, but any thoughts are welcome as we embark on this exciting decision-making process.
Question 1: Can you tell us a bit about yourself and your background?
Five years ago, my spouse and I embarked on a journey to Canada with our one-year-old, intending to explore the world. However, plans changed with the news of another addition to our family.
We made Revelstoke, a charming town east of Vancouver, our temporary home for the next few years. In early 2022, we returned to England to obtain a driving license for our converted 40-foot school bus, now a snug motorhome. Unfortunately, our timing coincided with a nationwide lockdown, leading to an extended stay with family. With closed borders and our eldest starting school, we relocated again.
Now a family of five, I decided to pursue a creative career shift instead of returning to the hospitality industry, sparking my journey into woodworking.
Question 2: Did you have any woodwork experience before you started training?
Experimenting with DIY projects, I crafted climbing arches and ramps for the kids after picking up tips from YouTube tutorials. The real plunge into carpentry happened during the conversion of our school bus into a motorhome in Canada. Engulfed in cladding the interior with wood, we constructed bunk beds, wooden storage boxes, tables, and more. However, it wasn’t until I began a course with Authentic Furniture UK Classes that I grasped the distinction between ‘rough’ woodworking and the finesse required in fine furniture making.
Question 3: Why did you decide to take up a fine furniture-making course?
Becoming a parent heightened my awareness of the environmental impact of plastic toys that often end up discarded in landfills, taking centuries to decompose. This unsustainable cycle contradicted my vision of responsible living. My admiration for wooden toys from companies like Grimm’s and Ostheimer led me to invest in more durable and eco-friendly alternatives for my children.
Despite the higher cost, I embraced the idea that quality trumps quantity. Yet, moments, when I craved a specific toy that wasn’t available in wood, sparked a realization – why not design, craft, and offer these toys myself, bridging the gap between desire and sustainability?
Question 4: What made you choose Authentic Furniture UK Classes for your training?
In my quest for woodworking training, I explored various options, including university degrees, college courses, and apprenticeships. However, most proved impractical – either too lengthy, expensive, or lacking focus on the specific woodworking skills I desired.
With three kids, proximity and minimal disruption to my partner’s childcare duties were crucial. I stumbled upon Authentic Furniture UK Classes online, ticking all the boxes: a convenient 45-minute drive, optimal duration, flexible scheduling, and a reasonable cost.
Training locally with the team also meant tapping into his wealth of knowledge about crafting fine furniture in Surrey and sourcing the best local wood.
Question 5: Can you tell us more about the workshop and the courses?
The course spanned six weeks, from 9 am to 5 pm, Monday through Friday. Despite the workshop’s extended hours from 8 am to 7 pm, catering to those eager to practice or catch up, staying late conflicted with cherished family time.
Our small cohort comprised seven individuals – myself, another woman, and five men. The camaraderie among us was exceptional, contributing to a positive learning environment.
The workshop’s idyllic setting, with horses, farm dogs, and picturesque views of the Farnham countryside, added a touch of tranquility to the immersive woodworking journey.
Question 6: What was your experience using all the different kinds of tools in the workshop?
Encountering an array of unfamiliar tools at the onset of the course was both bewildering and intriguing. Some tools were entirely new to me, and upon receiving them in the mail, I’d unwrap the package with a perplexed expression, wondering, “What the hell is this?” Yet, as the six weeks unfolded, I became familiar with each tool and gained confidence in handling them.
The revelation was astounding – achieving an impeccable finish using just hand tools became a testament to the platform’s effective teaching.
Question 7: Which part of the course did you enjoy the most?
Every aspect of the course was enjoyable, but the daily infusion of new knowledge kept the experience consistently engaging. The diverse demographics of the group added another layer of enrichment – everyone was mature, and many shared a common goal of establishing a woodworking business, creating an instant camaraderie among us.
Question 8: What are the things you learned doing the course apart from woodworking?
Discussions about venturing into the business side of woodworking emphasized crafting unique pieces that distinguish themselves in the market. Recognizing the impracticality of competing with mass-produced items, we delved into the importance of offering locally crafted, sustainable, hand-made pieces with the potential to become heirlooms. This journey deepened my appreciation for my children and underscored the vital need for a harmonious work-life balance. Engaging in something solely for personal growth and rediscovering the joy of learning a new skill added a refreshing dimension to the entire experience.
Question 9: What are your plans?
I’m optimistic about the possibility of the team organizing a machining course in the future, as those additional skills would greatly benefit my aspirations in the field.
For now, my short-term plan involves establishing a workspace in a corner of my parents’ workshop. I’ll dive into three or four designs to assess their feasibility, balancing my time while the kids are still young. Once the kids are in school full-time, I envision spending more time nurturing my woodwork. If the business proves financially viable, the long-term plan is to build a dedicated workshop in our garden.
What excites me is creating the ‘whole package’ – from designing and crafting wooden toys and furniture for children to marketing, photography, and establishing a shop.
Question 10: Do you have any advice for those looking to do the same course?
Just go for it. Venturing into a new field, especially to establish a business, can feel daunting. However, enrolling in a course provides invaluable support from an expert in the craft, fostering a collaborative environment where you can share concerns and learn from fellow participants.
It’s a far more reassuring and less stressful approach compared to the self-taught route I initially took. The structured guidance from a dedicated course makes the learning journey more manageable and rewarding.
Choosing the right construction material determines whether your furniture project will survive daily use or fall apart in months. The foundation of successful furniture making rests on three core material categories: solid wood for structural strength and timeless appeal, manufactured boards for stability and cost efficiency, and metal or composite elements for contemporary design and specialized applications. Understanding the working properties, preparation requirements, and ideal applications of each material transforms raw supplies into furniture that stands the test of time.
I’ve watched hundreds of students walk into my workshop convinced they needed the most expensive hardwood for every project, only to discover that a well-chosen plywood often delivers superior results for cabinets and built-ins. The material selection process isn’t about prestige. It’s about matching performance characteristics to your specific design requirements, skill level, and budget constraints.
The furniture construction landscape in 2026 offers more options than ever before. Traditional oak and walnut remain workshop staples, but engineered materials like bamboo composites and cross-laminated timber now provide sustainable alternatives with predictable behavior. Meanwhile, metal frames and acrylic panels enable designs that would be impossible with wood alone.
Most beginners stumble not because they lack skill, but because they start with materials that fight them at every step. Dense tropical hardwoods punish dull tools. Particle board crumbles under incorrectly placed screws. Even experienced makers benefit from a systematic approach to material selection, as outlined in our first furniture guide where proper material choices set the stage for confident construction. What follows is a practical framework for evaluating, preparing, and working with furniture construction materials that actually suit your project goals.
Essential Materials in Furniture Construction
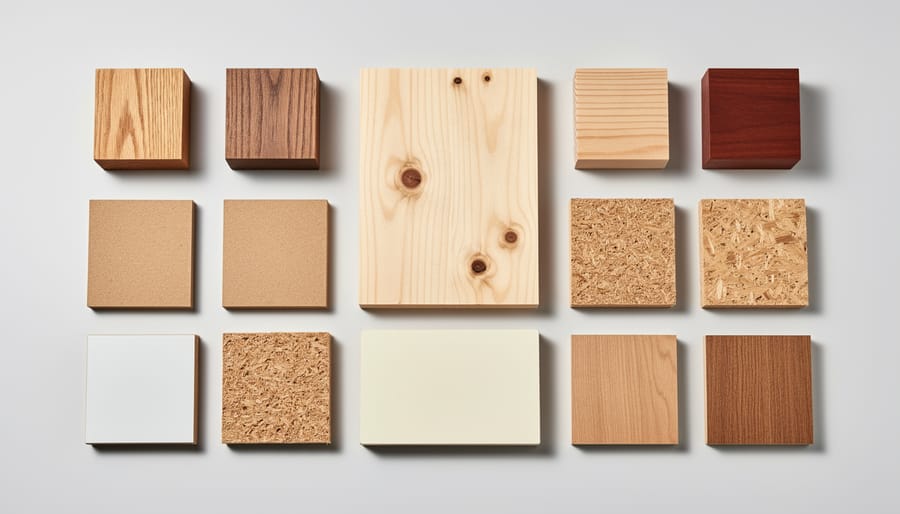
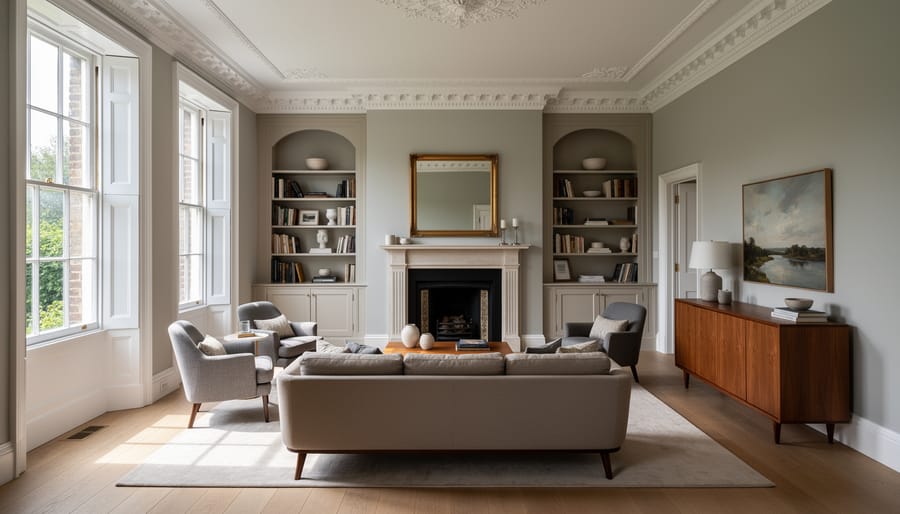
A curated spread of common furniture construction materials shows how different woods and engineered panels visually differ before you ever build.
Solid Timber: The Foundation of Fine Furniture
Solid timber remains the most prized furniture material because it brings unmatched character and structural integrity to every piece. The fundamental distinction between hardwoods and softwoods shapes everything from your cutting techniques to the longevity of the finished work.
Hardwoods, oak, walnut, cherry, maple, come from deciduous trees and typically offer greater density and durability. Their tight grain structure creates furniture that withstands decades of use while developing rich patina. Walnut’s chocolate tones and straight grain make it forgiving for beginners, while oak’s pronounced medullary rays add visual drama but demand sharp tools and careful planing to avoid tearout.
Softwoods like pine, cedar, and Douglas fir grow faster and cost less, but “soft” doesn’t mean weak. Old-growth pine built furniture that has survived centuries. These species work easily with hand tools and accept stains readily, though their open grain requires sealing before topcoats.
Grain pattern dictates both strength and beauty. Quarter-sawn timber, where growth rings run perpendicular to the face, resists warping and showcases striking ray figure in species like oak. Plain-sawn boards, more common and economical, display cathedral patterns but move more with humidity changes.
In Liam’s workshop, a recent dining table paired quarter-sawn white oak legs for stability with rift-sawn tops that balanced visual interest against movement concerns. The student learned that reading grain direction before cutting prevents splits and ensures joints align with the wood’s natural structure rather than fighting it.
Engineered Wood Products and Their Place
Engineered wood products earn their place in quality furniture when you understand their specific strengths. Plywood excels in applications requiring dimensional stability, cabinet backs, drawer bottoms, and curved components bend without splitting along grain lines. Its cross-laminated structure resists seasonal movement that would warp solid timber, making it invaluable for large panels.
MDF provides a perfectly flat, uniform substrate for veneering and painted finishes. The dense, void-free surface takes edge profiles cleanly and holds hardware reliably. I often specify it for painted built-ins where grain texture isn’t desired, though its weight and dust production during machining require consideration.
Particle board serves well in secondary applications where cost matters more than aesthetics, internal cabinet dividers or underlayment beneath veneer. Its lower structural strength limits use in load-bearing components.
The real craft lies in hybrid construction: combining engineered products where their properties shine with solid timber where strength and beauty matter most. This approach lets you build stable, cost-effective furniture without compromising the elements that define quality. Edge-band plywood panels with solid timber, use MDF cores with hardwood frames, and reserve your finest materials for visible surfaces.
Metals, Glass, and Composite Materials
Steel, aluminum, and brass bring structural integrity and modern aesthetics to furniture designs. Steel tubing creates robust table bases and chair frames, while brass hardware adds refined detail to drawers and doors. Aluminum extrusions work well for lightweight contemporary pieces, though they require specialized fastening techniques.
Tempered glass serves as dramatic table surfaces or cabinet doors, demanding careful edge finishing and proper support systems. It distributes loads differently than wood, always support glass uniformly across its edges rather than at discrete points.
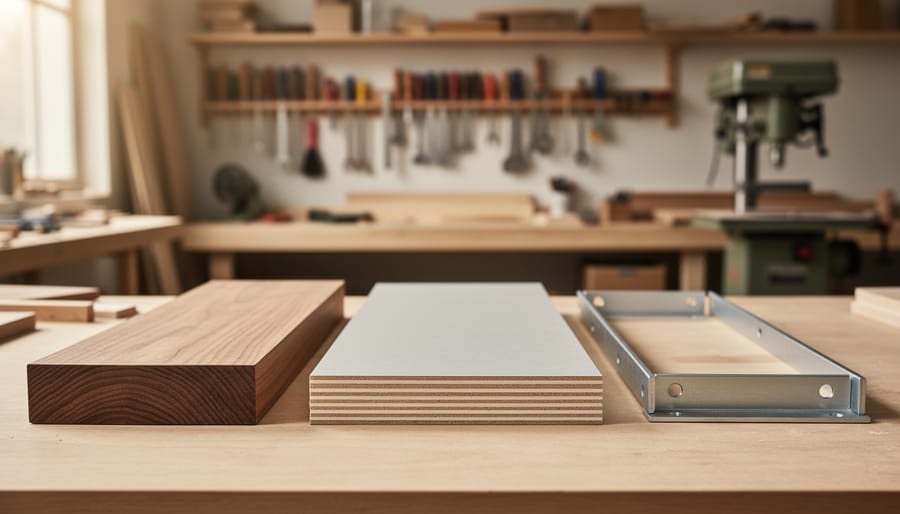
Composite materials like resin-bonded panels or carbon fiber components appear in specialized applications. These require different adhesives and fasteners than traditional materials. In my workshop, we integrate metal brackets and glass panels where they genuinely enhance function, not merely for fashion. Each material demands respect for its unique properties and proper joinery methods.
Tools and Preparation You’ll Need
Working with furniture construction materials demands proper tools and a methodical approach to preparation, even the finest timber becomes frustrating without the right equipment. Whether you’re pursuing beginner woodworking or advancing your skills, assembling the correct toolkit makes every material easier to handle and more forgiving during construction.
Your essential workshop setup divides into five categories, each addressing a specific stage of material work:
Measuring and marking tools: tape measure, combination square, marking gauge, pencil, and marking knife
Cutting tools: handsaw or circular saw, table saw for dimensioning, jigsaw for curves, and sharp chisels
Joinery tools: drill with bits, router with basic cutters, clamps in various sizes, and smoothing plane
Finishing tools: orbital sander with assorted grits, scrapers, and quality brushes or rags for finish application
Safety equipment: dust mask or respirator, safety glasses, hearing protection, and push sticks for machine work
Beyond tools, material preparation starts before any cutting begins. Bring timber into your workshop space at least two weeks before machining, allowing it to stabilize at the ambient humidity. Stack boards with thin spacers between each layer, creating airflow channels that prevent moisture trapping. This acclimatization period prevents boards from warping or twisting after you’ve invested hours in precise joinery.
Initial dimensioning, your first machining step, requires checking moisture content with a meter (aim for 8-12% for indoor furniture) and examining each board for defects. Cut rough lengths slightly oversize, giving yourself room to work around knots, splits, or discolored sections. In Liam’s workshops, students learn that this methodical preparation, though seemingly slow, actually saves time by preventing mid-project material failures. The right tools combined with patient preparation create the foundation for confident, successful furniture making.
Safety Considerations When Working with Furniture Materials
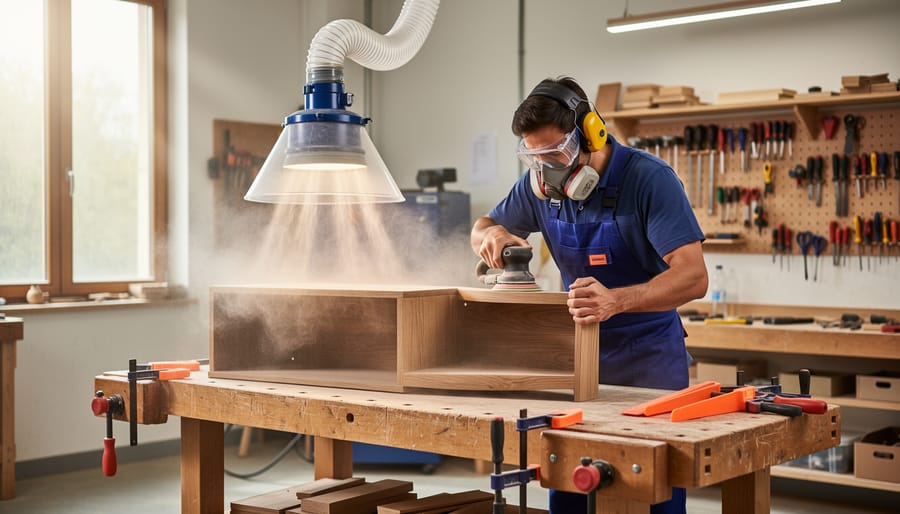
Safety gear and dust extraction are visible in action, emphasizing safe handling and cleaner workshop air when working with furniture materials.
Working with furniture materials exposes you to hazards that aren’t always obvious until you’ve already created a problem. The fine dust from machining timber, particularly hardwoods, represents one of the most serious long-term risks in any workshop. Your lungs have no mechanism for clearing particles smaller than 10 microns, and prolonged exposure leads to respiratory conditions that can end your woodworking journey permanently. Every powered tool, table saws, routers, sanders, planers, needs effective dust extraction connected directly at the source, not just a shop vacuum running nearby.
Warning: Some timber species, including walnut and many exotics like cocobolo or rosewood, contain toxic compounds that cause severe allergic reactions even in small quantities, always identify your material before machining and research its specific hazards.
Respiratory protection matters even with extraction systems running. A properly fitted P2 or P3 respirator filters what your extraction misses, especially during sanding operations that create the finest, most dangerous particles. Don’t rely on those flimsy dust masks from the hardware store; they’re nearly useless against fine wood dust.
MDF and particle board present different challenges. These engineered products release formaldehyde during cutting and generate dust so fine it becomes airborne instantly. The dust from these materials is also highly abrasive, wearing down cutting edges faster while creating greater health hazards. Increased ventilation and stricter respiratory protection become non-negotiable when working with composites.
Finishing chemicals demand equal respect. Solvent-based stains, lacquers, and oils release volatile organic compounds that affect your nervous system with repeated exposure. Work in well-ventilated areas, store chemicals in sealed containers away from heat sources, and wear nitrile gloves when handling any finish. The romantic image of the craftsperson applying oil with bare hands ignores the reality that many finishing products penetrate skin readily, carrying toxins directly into your bloodstream.
Step-by-Step: Selecting and Preparing Your Material
Step 1: Assess Your Project Requirements
Before you cut a single piece of timber or pull out your wallet at the supplier, you need a clear picture of what you’re building and how it will be used. Start by asking yourself four questions that will steer every material decision that follows.
First, consider the structural demands. Will this piece support significant weight, like a dining table bearing serving dishes and elbows, or is it primarily decorative? A bookshelf holding leather-bound volumes needs far more rigidity than a hallway console table. Think about joint types too: mortise-and-tenon frames require different material properties than edge-glued panels.
Second, examine the intended use and environment. A kitchen island faces moisture, heat, and daily wear that a bedroom dresser never encounters. Outdoor furniture demands materials that can handle UV exposure and humidity swings. In Liam’s workshops, students learn that a coffee table in a family home with young children needs different material resilience than one destined for an adult’s study.
Third, define your aesthetic vision. Do you want dramatic grain patterns or subtle uniformity? A contemporary clean-lined piece might call for straight-grained maple, while a rustic farmhouse table celebrates the character marks in reclaimed oak.
Finally, be honest about your skill level. If you’re just starting out, choose your first materials from forgiving species like pine or poplar rather than temperamental exotics. These four considerations work together to create a shortlist of suitable materials before you invest time or money.
Step 2: Evaluate Material Properties
Once you’ve clarified your project requirements, it’s time to examine the timber itself. Run your hand across the surface, does the grain feel tight and consistent, or wild and unpredictable? Liam teaches his students to assess five critical properties before committing to a material.
Hardness determines workability and durability. Press your thumbnail into an edge: hardwoods like oak resist the pressure, while softer species like pine yield slightly. This simple test reveals how the material will respond to tools and wear.
Grain direction shows how the wood grew. Hold the board at eye level and follow the lines. Straight grain machines cleanly and remains stable; interlocked or wavy grain adds visual drama but tears during planing and moves more with humidity changes.
Stability relates to the wood’s tendency to expand and contract. Quarter-sawn boards, where growth rings meet the face at 60-90 degrees, move less than flat-sawn lumber.
Examine color variation across the board, sapwood versus heartwood, mineral streaks, figuring. Finally, assess texture: open-pored woods like ash need grain filling for smooth finishes, while maple’s tight grain polishes directly.
Liam calls this “listening to the timber tell you what it wants to become.”
Step 3: Source and Inspect Your Materials
Finding quality materials requires knowing where to look and what to inspect before purchase. Specialist timber merchants offer better selection and expertise than big-box stores, staff can advise on species characteristics and help you choose boards with favorable grain. Salvage yards and reclamation specialists provide unique character timber, though require more careful inspection.
When selecting boards, check for splits, knots, cupping, and twist by sighting along the length. Reject pieces with checks extending deep into the timber or large dead knots that will fall out. Use a moisture meter to verify 8-12% moisture content for indoor furniture, wet timber will shrink and crack after construction.
Examine grain alignment relative to your project needs. Straight grain machines cleanly and remains stable. Figured grain adds visual interest but can tear during planing. For tabletops and panels, select boards with similar color and grain patterns.
Calculate quantities by adding 20-30% waste allowance for defect removal, grain matching, and mistakes. Liam teaches students to buy one extra board beyond calculations, the peace of mind outweighs the modest additional cost, and leftover timber finds use in smaller projects or test pieces.
Step 4: Condition and Acclimatize
Once your materials arrive at your workshop, resist the temptation to start cutting immediately. Wood needs to adjust to your workspace’s humidity and temperature, a process Liam calls “letting the timber settle in.” Stack boards horizontally with thin stickers (spacers) between each piece, allowing air to circulate around all surfaces. Space these stickers every 18-24 inches along the length, aligning them vertically to prevent sagging.
The conditioning period depends on material thickness and how drastically conditions differ from the timber yard. As a rule, allow one week per inch of thickness. A moisture meter becomes invaluable here, you’re aiming for equilibrium moisture content that matches your workshop environment, typically 8-12% for indoor furniture in most climates.
Store materials away from direct heat sources and drafts. Liam teaches students to check for readiness by testing a sample piece: machine it to final thickness, then let it sit overnight. If it remains flat and stable, your stock is ready for construction.
Step 5: Initial Preparation and Dimensioning
Once your material has acclimatized, the machining sequence matters as much as the techniques themselves. Start by rough-cutting pieces 25-50mm over final length, this extra material lets you work around end checks and gives you room to square things up later. At Liam’s workshop, students learn to mark the best face first, identifying the grain direction that’ll plane smoothly.
Face planing establishes your reference surface. Feed timber with the grain rising toward the outfeed table to prevent tearout. One flat face leads to edge jointing, where you create a 90-degree reference edge against that face. Check squareness frequently, your first two surfaces define everything that follows.
Thicknessing comes last, working down to final dimension in 1-2mm passes. Leave yourself 0.5mm over target for final hand planing or sanding. As you dimension, actively look for defects you can cut away. That knot near one end? Trim it off now rather than discovering it ruins a critical joint later.
The goal isn’t just flat boards, it’s preparing material that’ll behave predictably as you build.
Working Properties: How Materials Behave During Construction
Understanding how materials behave under your tools transforms furniture making from frustrating guesswork into confident craftsmanship. Each material has distinct working properties that determine how easily it cuts, how cleanly it shapes, and how forgiving it is when mistakes happen.
Solid hardwoods like oak and ash machine beautifully with sharp tools, producing clean cuts and crisp joinery. Their density means they hold details well, dovetails stay sharp, mortises remain true. But this same hardness demands respect: dull blades burn the wood, and forcing cuts can cause tearout. Cherry and walnut sit at the opposite end of the hardwood spectrum. They cut like butter, accepting hand planes and chisels with minimal resistance, which makes them excellent choices for hand-tool work and forgiving for students learning joinery techniques.
Softwoods present different challenges. Pine machines quickly but dents easily during handling and construction. Its varying density within growth rings can cause tools to dig in unexpectedly. One of Liam’s students, Sarah, learned this while building her first bedside table. After struggling with tearout on pine, she switched to poplar for her next project and found it machined more predictably despite being technically a hardwood.
Engineered products behave entirely differently. Plywood cuts cleanly but the cross-grain veneers can chip at edges, requiring backing boards during cutting and careful feed rates. MDF machines to glass-smooth surfaces and accepts paint beautifully, but its dust is particularly problematic and its weight surprises newcomers. It also dulls cutting edges faster than solid wood.
Grain direction matters enormously. Cutting with the grain feels effortless; against it, you fight the entire way. Quarter-sawn timber remains more stable and machines more predictably than flat-sawn boards, though both come from the same species. Learning to read grain direction before making cuts, looking at end grain, observing surface patterns, prevents most tearout problems.
The finish reveals everything. Some woods like maple show every surface imperfection under clear finish, demanding meticulous sanding. Others like oak are more forgiving, their open grain hiding minor surface flaws. Liam often has students practice on scraps with their chosen finish before touching the actual project pieces, a step that has saved countless hours of remedial sanding.
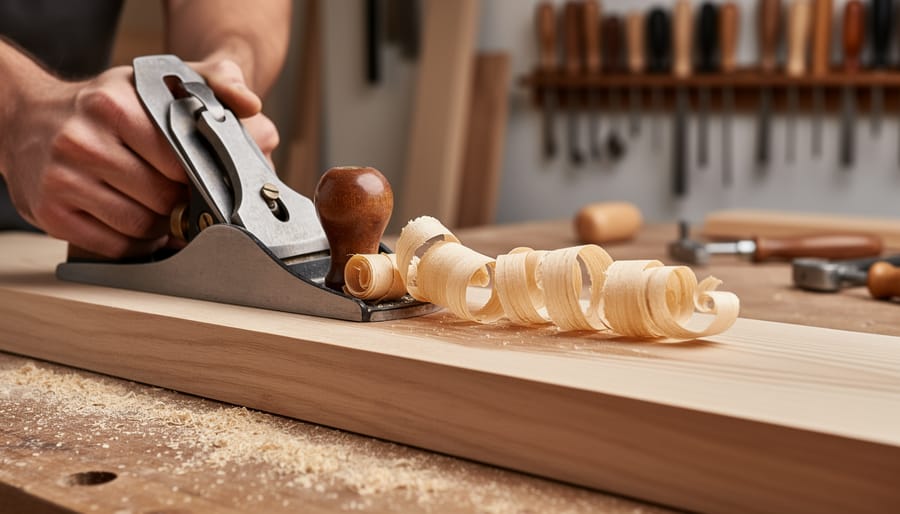
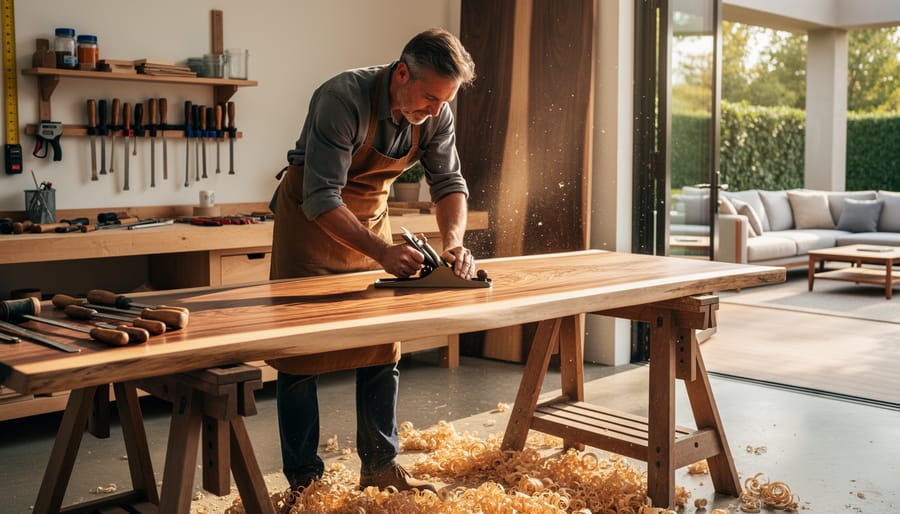
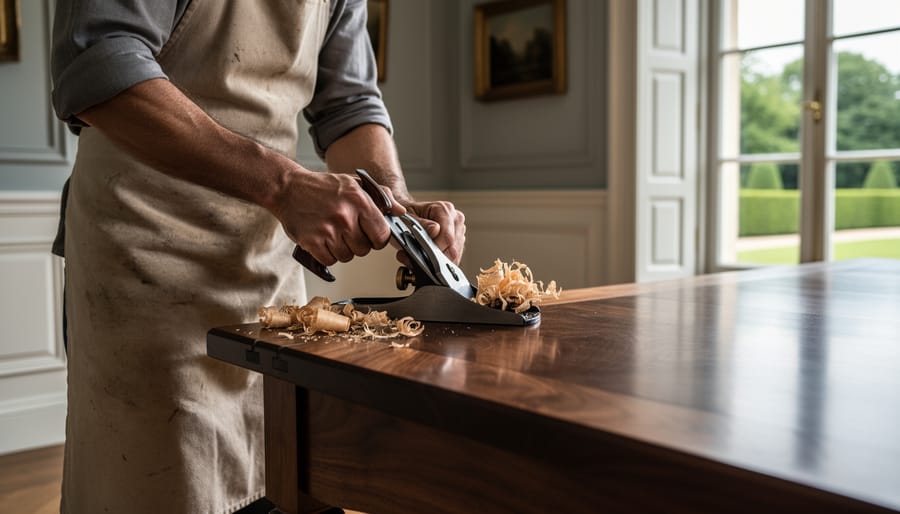
Clean planing creates thin shavings and a smooth surface, illustrating how solid timber responds to cutting and shaping.
Verification: Testing Your Material Choice
Before committing to your chosen material for a full project, run verification tests to confirm it will perform as expected. These simple checks can save hours of frustration and wasted effort on unsuitable timber or sheet goods.
Start with test cuts on scrap pieces from your selected material. Machine a small section through your table saw or router to assess how cleanly it cuts, excessive tearout, burning, or chipping signals potential problems. Test a sample joint using your planned construction method, whether that’s mortise-and-tenon, dovetails, or other joinery basics. The joint should fit snugly without forcing and hold together with appropriate strength for the furniture’s intended use.
Apply your planned finish to a test piece rather than discovering incompatibility on your completed work. Some timbers absorb stain unevenly or react poorly with certain oils and varnishes. Let the sample dry completely and evaluate the color, grain enhancement, and surface texture.
Your verification checklist should confirm these essentials:
Material machines cleanly without excessive tearout or burning
Test joints fit properly with appropriate tolerance and strength
Finish applies evenly and produces the desired appearance
Material demonstrates adequate strength for structural requirements
No significant movement occurs after proper acclimatization period
Warning signs that warrant reconsidering your material choice include persistent tearout regardless of cutting direction, joints that won’t hold without excessive clamping pressure, finish that blotches or won’t penetrate, or noticeable warping after the acclimatization period. Finding these issues during verification gives you the option to select alternative material before you’ve invested significant time in construction.
Common Challenges and How to Overcome Them
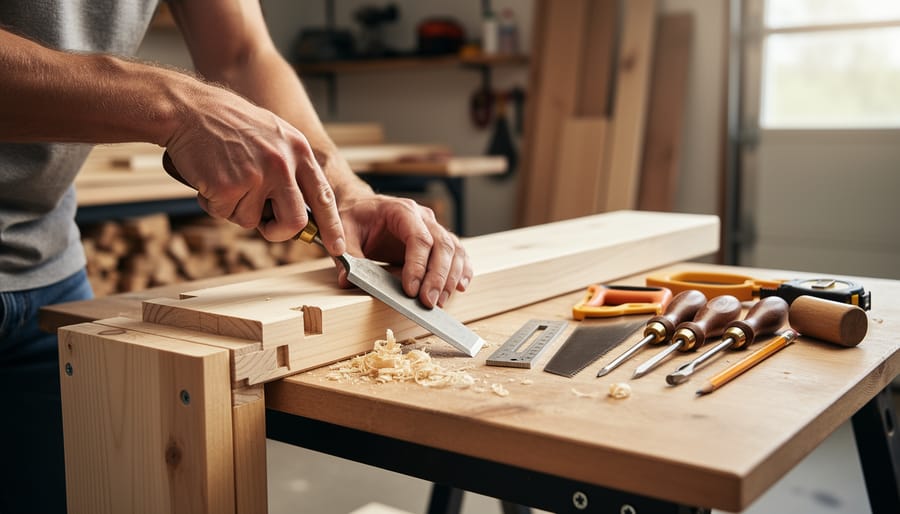
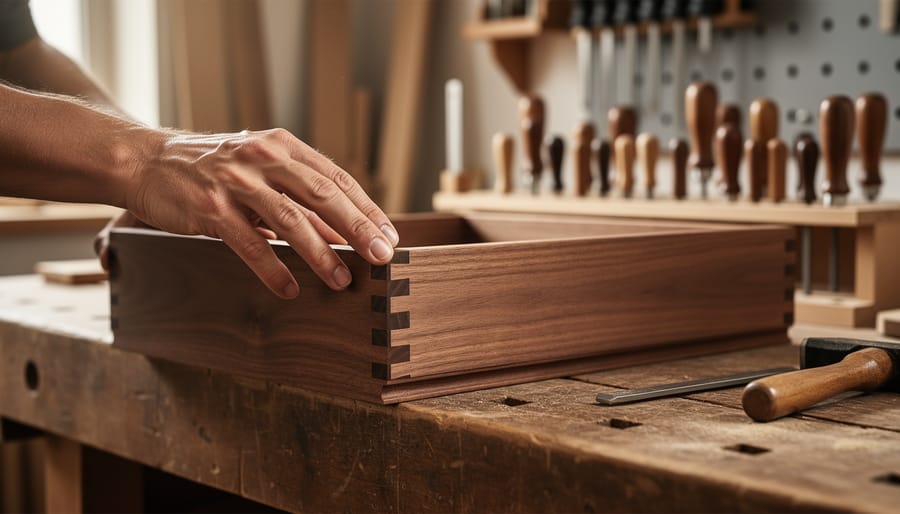
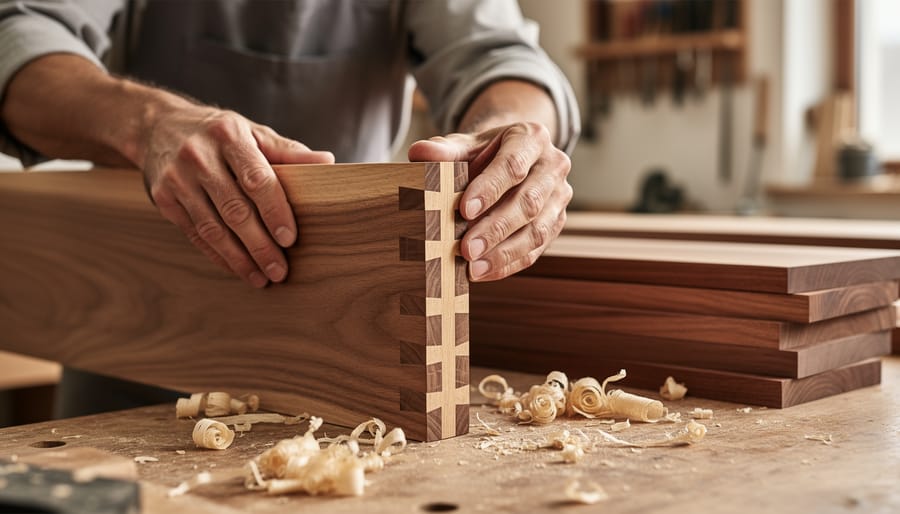
A sample joint and finishing test reflect how makers verify fit, stability, and surface quality before committing to the full piece.
Material challenges are inevitable in furniture making, but recognizing them early and knowing how to respond separates successful projects from abandoned ones. Through years of teaching, Liam has observed that most material problems fall into predictable patterns with straightforward solutions once you understand what’s happening.
Unexpected wood movement after machining is perhaps the most common frustration. Timber that seemed stable suddenly cups or twists within hours of being dimensioned. This typically signals the material wasn’t fully acclimatized to your workshop environment. The immediate fix involves re-machining the affected pieces, but prevention is simpler: bring timber into your workshop at least two weeks before working it, and stack it with stickers between boards to allow air circulation on all faces. If movement occurs mid-project, work quickly through joinery and assembly stages to lock the wood into its structural framework before further changes happen.
Difficult grain tears out during planing or creates rough surfaces that resist finishing. Rather than fighting it, adjust your approach. Reduce your planing depth to finer cuts, skew your hand plane to slice rather than chop the fibers, or switch to scraping and sanding for figured woods like bird’s-eye maple or wild-grained ash. Liam teaches students to view challenging grain as an opportunity to develop tool control rather than a defect in the material.
What should I do if I discover a hidden defect after cutting my material?
Reassess whether the defect affects structural integrity or just appearance. Small knots and checks can often be incorporated into less visible areas, while splits near joints require cutting new pieces from your waste allowance.
How do I adapt when my preferred timber species isn’t available?
Focus on matching the key properties your project requires rather than the specific species. If you needed oak for its hardness, ash or beech might substitute; if color was the priority, consider staining an alternative hardwood.
Can I mix different wood species in one furniture piece?
Yes, but choose species with similar movement characteristics and densities to avoid differential expansion problems. Contrasting woods work beautifully as visual accents when their structural properties are compatible.
Material shortages mid-project require creative thinking. Keep your cutoff pieces organized by size and quality. That walnut offcut from your last table might provide the perfect drawer pull for your current cabinet. When substitution becomes necessary, match the working properties and visual weight rather than insisting on identical species. A furniture maker’s ability to adapt gracefully to material challenges grows with each piece you build your next piece transforming potential setbacks into opportunities for creative problem-solving.
Next Steps: Building Your Material Knowledge
Building genuine material expertise happens through deliberate, ongoing practice rather than memorization. Each piece you create teaches you something new about how timber moves, how different species respond to tools, and which characteristics matter most for specific applications.
Start by working with a variety of species across different projects. If you’ve been using only oak, try ash or cherry. Notice how each timber cuts, finishes, and ages. Keep offcuts from every project and date them, these become invaluable references showing how materials change color and texture over time. Many experienced makers maintain a labeled collection of samples that they can touch and examine when planning new work.
Practical courses offer compressed learning that would otherwise take years to acquire alone. Liam’s furniture making courses combine material theory with hands-on selection and preparation, giving students direct experience reading grain, assessing quality, and matching timber to project requirements. Working alongside an experienced maker reveals subtleties that written guides simply can’t convey.
Visit timber yards regularly, even when you’re not buying. Handle boards, ask questions, and observe how professionals assess stock. Most suppliers welcome craftspeople who show genuine interest in understanding their materials.
Document your own projects with notes on which materials you used, how they performed during construction, and how they’ve held up over time. Photograph problem areas alongside successful sections. This personal reference library becomes more valuable than any textbook because it reflects your actual working conditions and methods.
Every furniture piece you complete adds layers to your material understanding. The wood that seemed challenging on your first project becomes familiar. The species you avoided begins to make sense. Trust that your knowledge compounds with each shaving that falls from your plane.
Mastering furniture construction materials isn’t something you learn overnight. It’s a gradual journey where scientific understanding meets hands-on intuition, and each project adds to your material literacy.
Throughout my years teaching at Liam O’Connor Furniture, I’ve watched countless students transform from cautious beginners into confident craftspeople who can assess a timber board and immediately know whether it suits their project. That confidence doesn’t come from memorizing charts or following rigid rules. It develops through touching different woods, making test cuts, experiencing how materials respond under your tools, and yes, occasionally choosing wrong and learning why.
Start where you are. If you’re building your first table, select forgiving hardwoods like oak or ash rather than temperamental exotics. Master joinery techniques with stable materials before tackling highly figured timbers that demand advanced skills.
Every piece you build expands your material vocabulary. You’ll begin recognizing grain patterns that signal strength or instability, understanding which species machine cleanly versus those requiring patience, and developing preferences based on real workshop experience rather than theory alone.
The materials are waiting. Your expertise will follow, one project at a time.
Creating your first piece of furniture through woodworking is a structured process that typically takes 10 to 20 hours spread across several days, requiring just six essential tools and a methodical approach that prioritizes safety and precision. Students beginning their furniture-making journey often start with a simple bench or side table, projects that teach fundamental joinery techniques while delivering a functional, handcrafted piece worthy of any home.
The transformation from raw lumber to finished furniture happens through a sequence of measuring, cutting, joining, and finishing operations that have remained largely unchanged for centuries. What has changed is accessibility. You don’t need a fully equipped workshop or years of apprenticeship to begin. With careful planning, a modest selection of quality tools, and attention to proven techniques, first-time furniture makers consistently produce pieces that surprise them with their beauty and durability.
Sarah Chen, one of our students who completed her first bench in spring 2025, arrived with zero woodworking experience and left with a walnut and maple piece now displayed in her living room. Her success wasn’t exceptional talent but rather following the complete process: understanding material selection, mastering safe tool operation, executing joints with patience, and applying finishes that protect and enhance the wood’s natural character.
This guide walks you through that same proven framework, breaking down each phase from choosing your wood species to final quality inspection. You’ll learn which tools justify the investment, how to set up a safe workspace in limited square footage, and the specific joinery methods that create furniture built to last generations.
Understanding Your First Project: Choosing What to Build
Your first furniture project sets the foundation for everything that follows in your woodworking journey. Choose wisely, and you’ll build confidence alongside your piece; choose poorly, and you might find yourself frustrated before you’ve truly begun.
The ideal first project balances ambition with realism. You want something that challenges you enough to develop genuine skills but doesn’t overwhelm with complexity that could derail your enthusiasm. Think about pieces that serve a real purpose in your life, furniture you’ll actually use creates stronger motivation to see the project through to completion.
Consider these characteristics when selecting your first build:
Small to medium size that fits comfortably in a home workshop or student workspace
Simple joinery techniques like pocket screws, dowels, or basic mortise and tenon joints
Practical function that justifies the time investment and creates immediate value
Opportunities to learn fundamental skills including measuring, cutting, and finishing
A side table makes an excellent starting point for most students. It requires only four legs, a top, and perhaps a lower shelf, manageable components that introduce you to working with square construction and basic joinery without demanding complex curves or angles. You’ll learn to mill timber to dimension, create stable joints, and achieve a flat, smooth surface.
Simple benches offer similar advantages with added structural learning. A three-foot garden bench or entryway seat teaches weight-bearing principles and the importance of robust joinery, yet remains forgiving enough for beginners. The rectangular form keeps cuts straightforward, and any minor imperfections won’t compromise the piece’s character.
Shelving units provide perhaps the most forgiving introduction to furniture making. A basic bookshelf with adjustable shelves or a wall-mounted display case allows you to focus on accurate measurements and clean joinery without the pressure of creating perfectly matched legs or complex angles. The modular nature means you can approach it in stages, completing one section before moving to the next.
Avoid ornate chairs, dining tables with extensions, or anything requiring compound angles for your debut project. Save cabinets with doors and drawers for after you’ve mastered basic carcass construction. Your first piece should build skills, not test patience you haven’t yet developed.
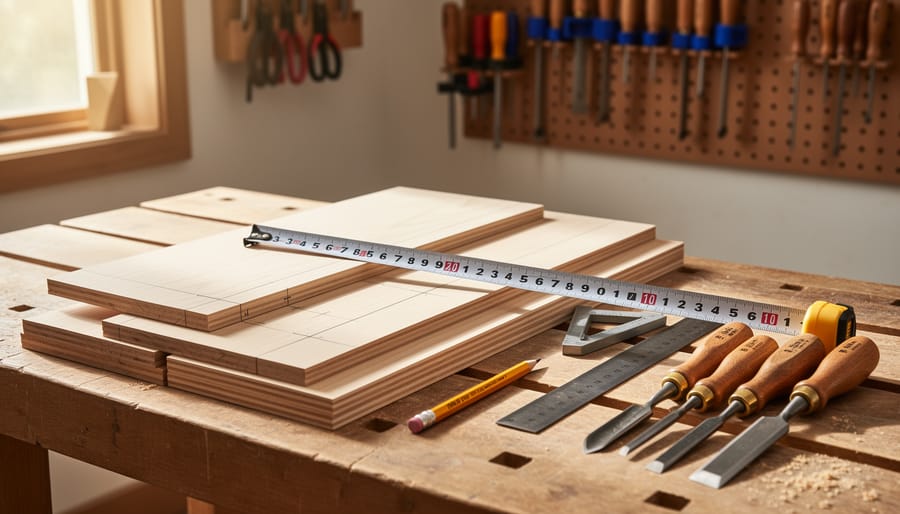
A student’s workbench shows the materials and tools ready for a first furniture build, with clean wood grain and careful measuring on display.
Essential Tools and Materials for Student Furniture Makers
Hand Tools Every Student Should Have
Starting with hand tools builds fundamental skills that power tools can’t teach. Your hands learn to read grain, feel resistance, and develop the muscle memory that separates competent work from exceptional craftsmanship.
A basic kit begins with measuring and marking: a combination square for checking right angles and marking parallel lines, a tape measure, and sharp pencils or marking knives. Accurate marking prevents costly timber waste and ensures joints fit properly.
For cutting, invest in a quality handsaw, either a crosscut or Japanese pull saw, rather than buying cheap versions that fight you at every stroke. A coping saw handles curves and waste removal between dovetails.
Your chisel set needs just four sizes to start: 6mm, 12mm, 19mm, and 25mm. Buy the best you can afford and learn to sharpen them immediately. Dull chisels are dangerous and frustrating.
A block plane smooths end grain and refines joints, while a jack plane flattens surfaces and removes material quickly. These two planes handle most student project needs without requiring a full bench plane collection.
Finally, add a mallet for chisel work, clamps in various sizes, and a sharpening system. Sharp tools make woodworking enjoyable rather than exhausting.
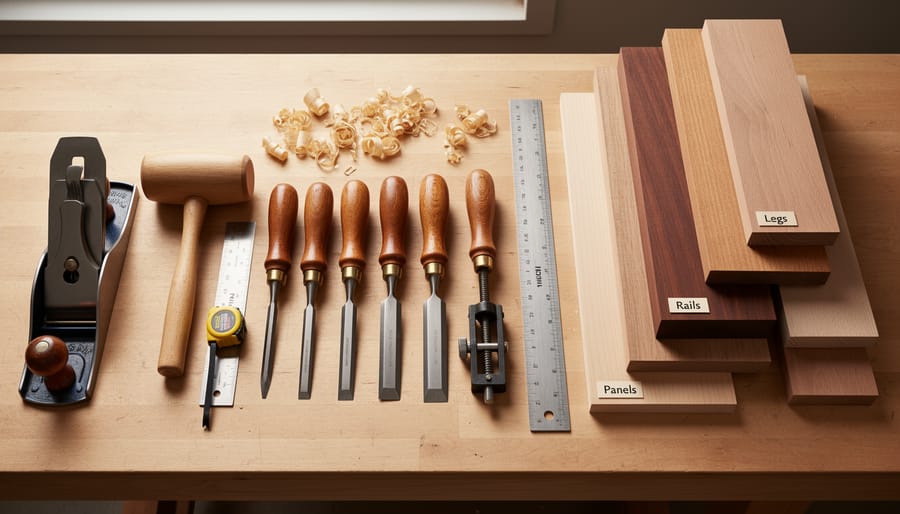
An organized layout of hand tools and selected timber illustrates the essentials students need before starting furniture making.
Power Tools: What to Invest in First
A circular saw or track saw should be your first power tool purchase, it transforms cutting large panels and breaking down timber from a laborious chore into a quick, accurate task. Students with workshop access can defer this, as most training spaces provide table saws, but ownership gives you freedom to work at home.
Next, invest in a random orbital sander. Hand-sanding furniture is physically exhausting and time-consuming. A quality sander delivers consistent results across large surfaces in a fraction of the time, and you’ll use it on every single project.
A cordless drill-driver is essential for pilot holes, hardware installation, and assembly work. Choose a reputable brand with interchangeable batteries, you’ll likely expand your cordless tool collection over time.
Consider waiting on larger machines like planers, jointers, or table saws until you’ve completed several projects. These represent significant investment and require dedicated space. Many students find shared workshop access or timber suppliers’ milling services more practical initially. Buy tools as specific projects demand them rather than stockpiling equipment you might rarely use.
Selecting Your Timber and Materials
Choosing the right timber transforms your furniture from a learning exercise into something you’ll treasure for years. Start with hardwoods like oak, ash, or cherry, they’re forgiving to work with and age beautifully, though they cost more than softwoods. Pine and poplar offer budget-friendly alternatives that still deliver satisfying results for first projects.
Examine each board closely before buying. Look for straight grain running parallel to the board’s length, as wild or interlocking grain tears out easily under hand planes and chisels. Avoid boards with large knots near where you’ll cut joinery, knots are hard, unpredictable, and weaken structural connections.
Moisture content matters enormously. Kiln-dried timber at 8-10% moisture content remains stable indoors and won’t warp after you’ve assembled your piece. Many timber merchants will check moisture levels with a meter if you ask.
Buy 20% more material than your cutting list specifies. This buffer accounts for defects you’ll discover during milling and the occasional miscut that every student makes. Local sawmills often sell offcuts and shorts at significant discounts, perfect for student budgets without compromising quality.
Workshop Safety: Protecting Yourself While You Learn
Before you pick up your first chisel or switch on a saw, understand this: safety isn’t just a checklist you tick off, it’s the foundation upon which all good woodworking practice is built. Every accomplished furniture maker has embedded safety into their muscle memory, and as a student, developing these habits from day one will serve you throughout your entire woodworking journey.
Start with essential PPE for woodworking: safety glasses or goggles to protect against flying chips and dust, hearing protection when operating power tools, and a properly fitted dust mask or respirator for sanding and machining operations. These aren’t optional extras. Wood dust is a respiratory irritant and potential carcinogen, while a single wood chip striking your eye can end your woodworking career permanently.
Warning: Never operate power tools without proper training and supervision, and always use guards and safety devices as designed, removing them to “work faster” is how serious injuries happen.
Your workshop environment matters as much as your personal protection. Keep floors clear of offcuts and debris that could cause trips or slips, ensure adequate lighting so you can see cut lines and blade positions clearly, and maintain proper ventilation to manage dust and fumes. Before starting any cut, take three seconds to check your body position: stand to the side of the blade path, never reach over running machinery, and keep both hands engaged with the workpiece or tool handles.
Develop the habit of inspecting tools before use. Dull blades require more force and are more likely to slip or kick back. Loose handles, frayed cords, and damaged guards all signal stop. Your concentration matters too, rushing, fatigue, and distractions lead to mistakes. If you feel tired or unfocused, step away. The wood will still be there tomorrow, but fingers don’t grow back.
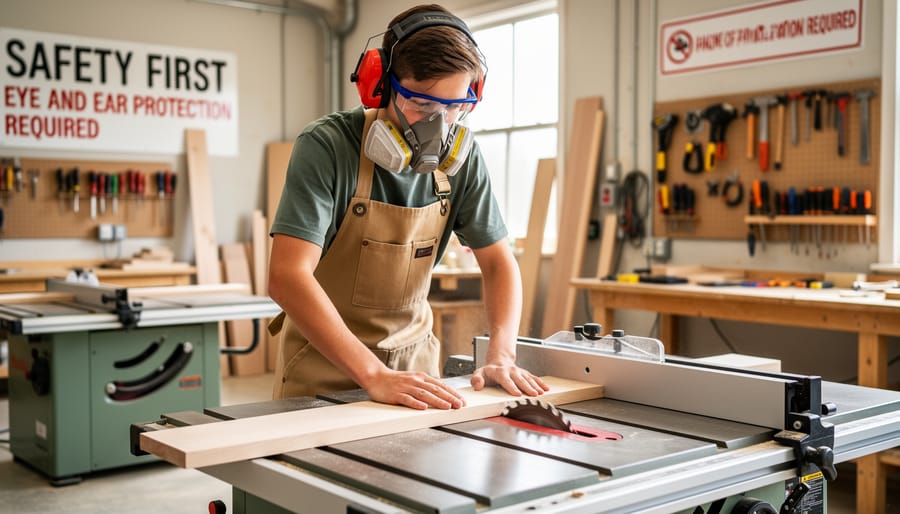
A safety-first moment shows a student operating a table saw with protective gear and careful control, emphasizing responsible woodworking practices.
The Furniture Making Process: From Design to Completion
Step 1: Creating Your Design and Cutting List
Every successful furniture project begins on paper, not at the workbench. Before cutting a single piece of timber, create a simple sketch showing your piece from multiple angles, front, side, and top views work well. These don’t need artistic skill; clear lines with dimensions marked are sufficient. Measure twice, and add those measurements directly to your drawing.
From your sketch, develop a cutting list: a detailed inventory of every component with its finished dimensions (length, width, thickness) and quantity needed. List the longest pieces first, this helps when selecting boards. Include notes about grain direction for visible surfaces. A typical side table might list: “2 legs, 700mm × 45mm × 45mm” and “1 top, 500mm × 400mm × 20mm.”
Calculate your material requirements by adding waste allowance. For rough-sawn timber, add 25mm to length for end defects and 3-6mm to thickness for milling. This planning prevents mid-project material shortages and reduces expensive waste. Students who skip this step invariably end up making unnecessary trips to the timber merchant or compromising their design when they run short.
Step 2: Milling and Preparing Your Timber
Milling timber is where raw lumber transforms into precise furniture components. This process establishes the foundation for accurate joinery, so take your time here, rushing through preparation will haunt you during assembly.
Start with rough-sawn timber that’s typically oversize and uneven. Your goal is creating four flat, square surfaces on each board. Begin by identifying your best face, the side with the most appealing grain and fewest defects. Flatten this surface using a hand plane or jointer, checking with a straightedge until no light passes underneath. This becomes your reference face, the datum point for all subsequent operations.
Next, prepare an adjacent edge square to that face, creating your reference edge. Use a marking gauge to scribe your final thickness from the reference face, then plane the opposite face parallel to it. Finally, rip the board to width, keeping your reference edge against the fence.
This sequence, face, edge, thickness, width, ensures every component has consistent dimensions and square corners. Student furniture makers often underestimate how critical this step is. Properly prepared timber means joints fit snugly and assemblies stay square, while poorly milled components create frustration at every subsequent stage.
Step 3: Marking and Cutting Joinery
Joinery transforms separate pieces of timber into a cohesive, structurally sound piece of furniture. For your first project, choose a joint appropriate to your skill level and available tools. Dowel joints offer simplicity, drill accurately aligned holes, apply glue, and insert hardwood dowels to create strong connections between components. Pocket hole joinery, using a specialized jig, allows rapid assembly with screws driven at an angle, ideal for face frames and internal structures where the holes won’t show.
If you’re ready for a traditional challenge, the mortise and tenon joint teaches fundamental skills that underpin all fine furniture making. Mark the mortise location carefully with a marking gauge, working from your reference face. Cut the mortise using a chisel and mallet, removing waste in stages to maintain clean walls. The tenon, cut on the rail end, must fit the mortise precisely, aim for a snug push fit that requires gentle persuasion rather than force.
Accuracy matters more than speed. Check each marking twice before cutting, and test-fit frequently. A poorly cut joint compromises both strength and appearance, while patience in this step pays dividends during assembly.
Step 4: Dry Assembly and Fitting
Dry assembly is your chance to catch problems before glue makes them permanent. Fit all joints together without adhesive, checking that everything aligns properly and sits flush. This rehearsal reveals tight spots that need easing, gaps requiring adjustment, or components cut slightly off-square. Use clamps to hold the assembly together exactly as you will during the final glue-up, then step back and assess from multiple angles. Check diagonal measurements to confirm the piece is square, they should match within a millimetre or two. Mark where each clamp will go and which components join in what sequence. Students who skip this step inevitably face scrambling during glue-up when working time is limited and mistakes costly.
Step 5: Gluing and Clamping
The glue-up transforms your carefully fitted components into a permanent structure, and there’s no undoing it once the adhesive sets. Before opening any glue bottle, lay out every clamp you’ll need and position them within arm’s reach, a panicked search for the right size clamp wastes precious working time.
Apply PVA wood glue sparingly to joinery surfaces; a thin, even layer bonds better than excess that simply squeezes out. Work methodically through your assembly sequence, checking diagonal measurements to verify the frame sits square before the glue begins to grab. Position clamps to distribute pressure evenly across joints without bowing components, and use softwood blocks to prevent clamp marks on your finished surfaces. Most woodworking adhesives allow fifteen to twenty minutes of open time, but temperature and timber moisture affect this, move deliberately, not frantically.
Step 6: Final Shaping and Surface Preparation
After glue-up comes the transformative work of refining your piece. Start by scraping or carefully planing away any dried squeeze-out around joints, this prevents finish problems later. Use a sharp hand plane or card scraper to flatten surfaces and remove machine marks, working with the grain direction. Progress through sandpaper grits systematically: 80 or 100 to remove plane marks, then 120, 180, and finally 220 for furniture-grade smoothness. Sand with the grain in long, even strokes, checking your progress by feel and oblique lighting that reveals scratches. This patient surface preparation determines how your finish will look, so don’t rush it.
Finishing Your Work: Protection and Presentation
Your furniture’s surface finish serves two vital purposes: protecting the wood from moisture, dirt and wear while bringing out its natural beauty. As a student woodworker, choosing and applying the right finish can transform a competently built piece into something that looks genuinely professional.
Start by understanding your options. Oil finishes like Danish oil or tung oil penetrate the wood fibres, offering natural protection and easy application, simply wipe on with a cloth, let it soak in for fifteen minutes, then wipe off the excess. They’re forgiving of mistakes and perfect for first projects, though they provide moderate protection. Wax finishes add a soft lustre and pleasant feel but offer minimal moisture resistance, making them better as a topcoat over oil rather than a standalone finish.
For greater durability, consider varnishes or polyurethanes. Water-based versions clean up easily and dry quickly with minimal odour, while oil-based varieties provide richer colour and superior protection. Apply thin coats with a quality brush using long, smooth strokes in the direction of the grain. Three thin coats always beats one thick one, thick applications drip, sag and take forever to cure properly.
Surface preparation determines your finish quality more than the product itself. After final sanding, vacuum the piece thoroughly and wipe it down with a slightly damp cloth to remove every speck of dust. Let it dry completely before applying finish.
Test your chosen finish on scrap wood from your project first. This reveals how it affects the colour and lets you practise application technique without risking your hours of work. Some woods darken dramatically with certain finishes, better to discover this on a test piece than on your completed table.
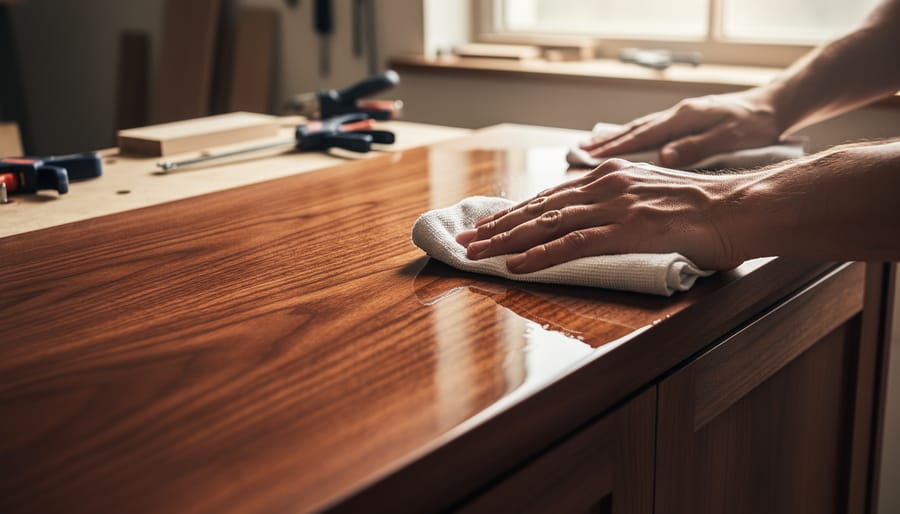
The final stage comes to life as finishing oil deepens the wood tone and reveals a smooth, protective sheen on a first furniture piece.
Verification and Quality Assessment: Evaluating Your Finished Piece
Once you set down your tools and step back from your completed piece, the real learning begins. Evaluating your finished furniture isn’t about harsh self-criticism, it’s about developing the trained eye that separates hobbyists from craftspeople. This assessment process teaches you to see what worked, what didn’t, and most importantly, why.
Start with a systematic walk-around inspection. Examine your piece from all angles, at different heights, and in varied lighting conditions. Natural daylight reveals details that workshop fluorescents often hide. Run your hands over surfaces, your fingertips will detect inconsistencies your eyes might miss. Check these essential quality markers:
Structural soundness: Apply gentle pressure to test for wobble or flex where there shouldn’t be any
Joint tightness: Look for gaps in mortise and tenons, miters, or edge joints
Surface finish consistency: Check for missed spots, drips, brush marks, or uneven sheen
Dimensional accuracy: Verify that legs are equal length, surfaces are level, and the piece sits flat
Place a straightedge across flat surfaces to reveal any bowing or twisting. Open and close any drawers or doors repeatedly, they should move smoothly without binding or rattling. For chairs or benches, sit on them. For tables, apply downward pressure at the corners. Your furniture needs to function, not just look beautiful.
Document what you discover. Take photographs from multiple angles, and keep written notes about specific joints that fit perfectly or areas where tearout occurred. This record becomes invaluable when planning your next project. Ask yourself honest questions: Where did my measuring falter? Which joinery technique needs more practice? Did I rush the sanding?
Learning from Student Success Stories
When Emma enrolled in her first woodworking course, she’d never held a hand plane. Six weeks later, she walked out with a cherry side table that now sits in her living room, complete with through-tenon joinery she’d carefully cut by hand. Her journey wasn’t without setbacks. She split two table legs learning to cut mortises and had to remake them, which taught her more about grain direction than any textbook explanation could. That frustration turned into understanding, and by the final week, she was helping newer students avoid the same mistake.
James chose to build a simple hall bench for his first project, drawn to its practicality. His instructor noticed he struggled with confidence using chisels, so they spent extra time on paring techniques before moving to joinery. The breakthrough came when James understood that sharp tools require less force, suddenly his cuts became controlled and precise. His finished bench features lap joints he’s genuinely proud of, and he recently sent photos of it holding coats and shoes in his entryway.
What strikes you when watching students work through these projects isn’t perfection, it’s transformation. Sarah’s bookshelf has slight gaps in one dovetail joint that she chose to leave rather than remake the piece. She calls it her “learning line” and says it reminds her how far she’s come. These aren’t showroom pieces, but they’re solid, functional furniture that students built with their own hands under expert guidance.
The structured environment matters enormously. Having someone correct your sawing angle before you’ve cut through the workpiece, or showing you exactly where your marking gauge reference should sit, these moments prevent compounding errors that discourage self-taught beginners.
Common Challenges and How to Overcome Them
Every student furniture maker confronts similar hurdles, and recognizing these challenges early helps you navigate them with less frustration. Measurement errors rank among the most common setbacks, often stemming from confusion between reference faces or misreading tape measures under time pressure. The solution lies in slowing down and double-checking every measurement before cutting. Adopt the carpenter’s mantra “measure twice, cut once,” and mark your reference edges clearly on each board. When you do make a cutting error, assess whether the piece can be repurposed elsewhere in your project before discarding it entirely.
Wood tearout, particularly when planing or routing across the grain, troubles beginners who haven’t yet learned to read timber direction. You can minimize tearout by taking lighter passes, keeping your tools sharp, and working with the grain whenever possible. When cross-grain cuts are unavoidable, score the cut line with a marking knife first to sever the wood fibres cleanly. Backing boards placed behind your workpiece also prevent exit tearout during drilling or sawing operations.
Key Takeaway: Mistakes aren’t failures, they’re feedback. Every measurement error, tearout, or misaligned joint teaches you something valuable about material behaviour, tool control, or planning that no textbook can convey as effectively. Patience with yourself accelerates genuine skill development.
Glue squeeze-out and clamp marks frustrate students aiming for clean surfaces. Control squeeze-out by applying glue sparingly and keeping a damp cloth nearby to wipe excess immediately. Place cauls (scrap wood strips) between clamps and your workpiece to distribute pressure evenly and prevent denting. When joints don’t close perfectly during assembly, resist the temptation to over-tighten clamps, which can distort the piece. Instead, disassemble, refine the joint fit, and try again.
Gap-filling becomes necessary occasionally, but view it as a last resort rather than standard practice. Small gaps can be addressed with wood shavings mixed into glue or purpose-made filler matched to your timber. Larger gaps signal underlying issues with joint cutting or assembly sequence that you should resolve in future projects rather than repeatedly disguising.
Frequently Asked Questions About Student Furniture Making
Starting your furniture making journey naturally raises practical questions. Here are answers to the queries we hear most often from students considering woodworking courses or beginning their first projects.
How much does it cost to start making furniture as a student?
Initial costs vary significantly based on your approach. Access to a shared workshop or course facility with existing tools costs between £300-800 for an introductory course, while building a basic home toolkit can range from £200 for essential hand tools to £1,000+ if you include power tools. Many students begin with course access to learn what tools they genuinely need before investing personally.
How long does it take to complete your first piece of furniture?
A simple first project like a side table or small bench typically requires 20-40 hours of workshop time spread over several weeks. In a structured course environment, you might complete this across 6-8 weekly sessions, while self-directed learners working evenings could take 2-3 months depending on available time.
Do I need woodworking experience before starting a furniture making course?
No prior experience is necessary for beginner courses. Quality instruction assumes you’re starting from scratch and builds skills progressively from basic tool handling through to completed projects.
What’s the difference between teaching myself and taking a formal course?
Self-teaching offers flexibility and lower upfront costs but requires discipline, trial-and-error learning, and tool investment. Formal courses provide structured progression, immediate feedback on technique, access to professional equipment, and the invaluable experience of learning alongside other students, which accelerates skill development considerably.
The investment in furniture making, whether time or money, pays dividends in lasting skills. Students who commit to structured learning typically produce their first quality piece within weeks rather than months of uncertain experimentation. The supportive environment of a workshop, where questions receive expert answers and mistakes become immediate teaching moments, transforms the learning curve from frustrating to enjoyable. Many students find that the confidence gained from completing that first project under guidance becomes the foundation for a lifetime of creative woodworking.
Creating your first piece of furniture marks the beginning of a lifelong journey in craftsmanship. What might seem daunting at the outset, transforming raw timber into a functional, beautiful object, becomes achievable when you approach it methodically, armed with the right knowledge and realistic expectations.
The path from novice to confident furniture maker isn’t about innate talent. It’s about deliberate practice, patient attention to technique, and learning from each project’s triumphs and missteps alike. Every piece you build, whether a simple side table or a more ambitious bookcase, strengthens your understanding of timber behavior, joinery principles, and finishing methods.
You don’t need a fully equipped professional workshop to start. Begin with essential hand tools and a modest selection of quality timber. Focus on mastering fundamental skills, accurate measuring, clean sawing, fitting joints patiently, rather than rushing to tackle complex designs. The furniture that emerges from careful, considered work will serve you for years, bearing the distinctive character that only handmade pieces possess.
Formal courses provide structure, expert feedback, and access to equipment that accelerates your learning. Self-guided study demands more discipline but offers flexibility. Whichever route you choose, commit to safe practices from day one and embrace the iterative nature of skill development.
Your first completed piece represents more than assembled wood and glue. It’s tangible proof that you can create lasting value with your own hands, a foundation for everything you’ll build next.
When Liam O’Connor transformed his custom furniture workshop into a commercially viable business, he didn’t compromise on craftsmanship. He borrowed a page from Henry Ford’s playbook. The comparison isn’t about mass production or assembly lines. It’s about making exceptional quality accessible through smart, repeatable processes that preserve the soul of handcrafted work while building a sustainable business.
O’Connor’s approach challenges the false choice many furniture makers face: either create one-of-a-kind pieces that take weeks to complete, or sacrifice quality for volume. His furniture-making philosophy proves you can design beautiful, well-constructed pieces that don’t require starting from scratch every time. Think of it as creating a signature collection rather than bespoke commissions. Each piece maintains high standards, but the production process becomes efficient enough to reach more customers at prices they can actually afford.
This shift requires rethinking everything from design to workshop organization. O’Connor developed modular design elements that allow for customization within a framework. He standardized certain joinery techniques and built jigs that ensure consistency without robotic repetition. The result? Furniture that still bears the marks of skilled hands but doesn’t carry the astronomical price tag of fully custom work.
The lessons from his journey matter whether you’re selling your first dining table or looking to transition from weekend projects to full-time furniture making. He’s shown that commercial success doesn’t mean abandoning the craft traditions that drew you to woodworking in the first place. It means being strategic about where you invest your time and creative energy, building systems that support quality rather than undermine it, and recognizing that accessibility can coexist with excellence.
The ‘Ford’ Philosophy: Making Quality Furniture Accessible
When Henry Ford revolutionized automobile manufacturing, he didn’t cheapen the product. He made a good car available to more people by rethinking how it was built. Liam O’Connor applied this same principle to furniture making, recognizing that traditional craftsmanship didn’t have to remain the exclusive domain of wealthy clients commissioning bespoke pieces.
The core of this philosophy lies in standardization without sacrificing soul. Rather than treating each furniture piece as a completely unique creation requiring dozens of custom decisions, Liam identified which elements could be systematized. Drawer construction methods, joinery techniques, and finishing processes became refined, repeatable procedures. This didn’t mean assembly-line monotony. It meant that the technical excellence honed on high-end commissions could be deployed efficiently across multiple pieces.
Quality furniture shouldn’t be a luxury reserved for palaces. By refining our processes, we can offer the same joinery and attention to detail at a price point that makes sense for real homes.
This approach required a fundamental shift in thinking. Traditional bespoke makers often reinvent solutions for each project, which builds expertise but creates inefficiency. Liam developed a library of proven designs and construction methods that could be adapted rather than created from scratch. A dining table might use the same mortise-and-tenon joint perfection developed for palace work, but the design itself followed tested proportions rather than requiring endless client consultations.
The accessibility piece extended beyond price. Liam’s furniture needed to work in actual homes, not just grand estates. Dimensions suited modern living spaces. Finishes could withstand family use, not just admiration from a distance. This practical consideration distinguished his commercial work from mere cost-cutting.
The ‘Ford’ comparison goes only so far. Ford’s factories eliminated skilled labor. Liam’s workshop elevated it by removing the inefficiencies that made traditional furniture prohibitively expensive. Every mortise was still cut with precision. Every surface still received proper attention. The difference was that techniques proven across hundreds of pieces replaced the trial-and-error approach that inflates bespoke pricing.
This philosophy created a sustainable middle ground between mass-produced flatpack furniture and unaffordable custom commissions. Quality craftsmanship became viable as a business, not just an artistic pursuit.
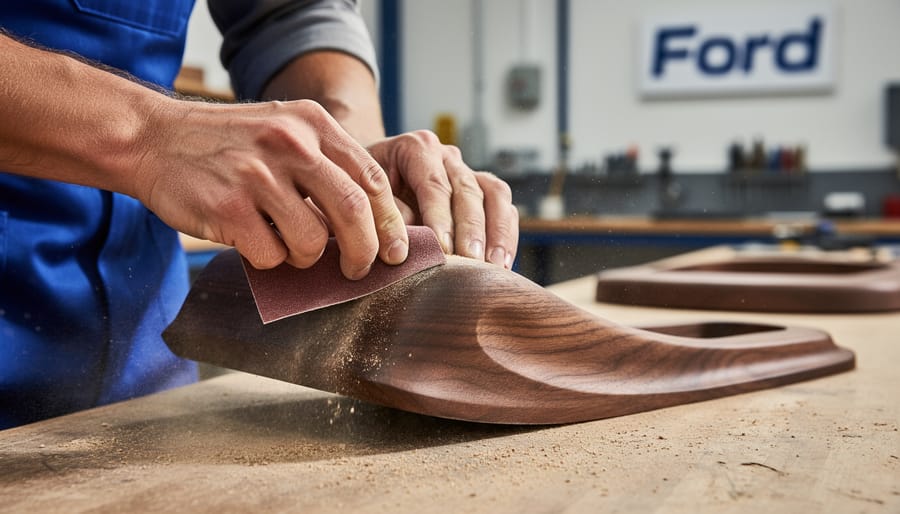
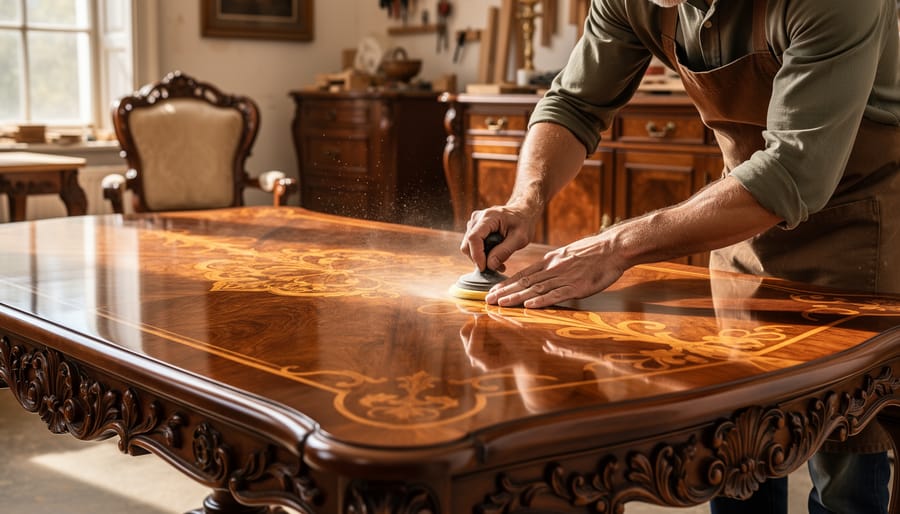
A craftsman sanding a walnut component shows the hands-on quality at the heart of the “Ford” approach, strong craftsmanship that can scale.
From Kensington Palace to Commercial Production
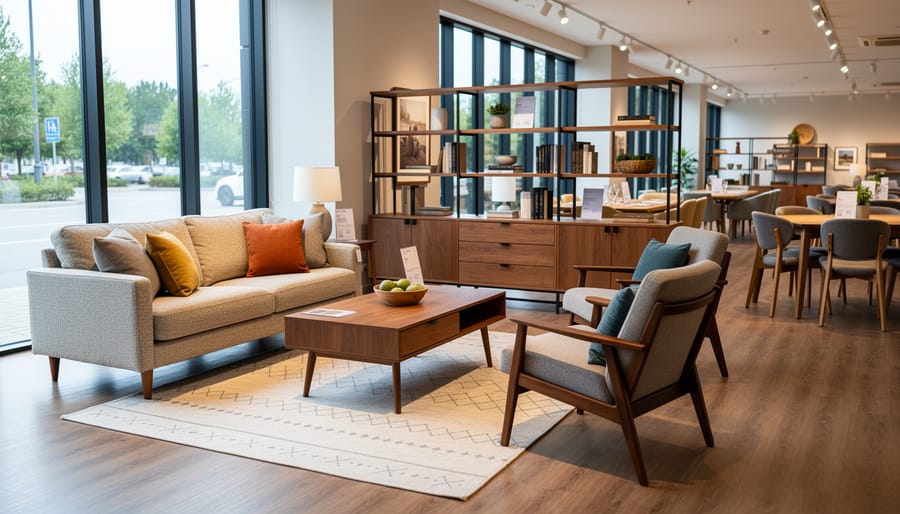
An inviting showroom display highlights how quality, well-designed furniture can be presented for everyday customers, not just elite commissions.
The Turning Point: Recognizing Market Opportunity
Liam’s pivotal moment came not in a boardroom, but in his workshop after completing yet another bespoke commission that had taken months to deliver. While the piece was exquisite, he recognized a troubling pattern: his income remained unpredictable, and he was turning away potential clients who couldn’t afford his prices or wait times.
The breakthrough arrived when several clients independently asked if he could create simpler versions of his signature designs. They admired his work but needed furniture that fit tighter budgets and faster timelines. Rather than viewing this as a compromise, Liam saw an untapped market segment: people who valued craftsmanship but couldn’t access traditional bespoke furniture.
He spent weeks analyzing his most popular commissions, identifying which design elements resonated most strongly and which could be streamlined without losing character. The data was clear, there was substantial demand for furniture that sat between mass-produced pieces and fully custom work.
The decision to pivot wasn’t immediate. Liam consulted with other makers, studied production workflows, and calculated whether he could maintain quality standards at scale. When he committed to the transition, he did so with a specific target: furniture that embodied 80% of his bespoke quality at 40% of the price, achievable through refined processes and selective simplification.
Balancing Bespoke Quality with Production Efficiency
Liam’s breakthrough came from redesigning his workflow rather than cutting corners. He developed a modular approach to furniture construction, creating standardized components that could be combined in various configurations while retaining handcrafted details. Door panels, drawer fronts, and joinery elements were produced in small batches using jigs and templates he refined over months of testing.
The real innovation was knowing where to invest time. Liam identified three quality touchpoints customers actually notice: joinery precision, finish quality, and hardware installation. He maintained his exacting standards in these areas while streamlining steps that added production time without visible benefit. Hand-planing show surfaces remained non-negotiable, but he switched to machine preparation for hidden components.
His workshop reorganization proved equally critical. Tools and materials were positioned to minimize movement between stations. He batch-processed similar operations across multiple pieces rather than completing one unit at a time. A commission that once took three weeks could now be finished in eight days without sacrificing structural integrity or aesthetic appeal.
This wasn’t mass production. Liam still hand-selected timber, cut mortise-and-tenon joints by hand, and applied finishes in thin, carefully rubbed coats. The difference was intentional efficiency. Every motion had purpose, every process had been tested, and the result was furniture that maintained bespoke quality at a pace that made commercial sense.
Commercial Success Through Education
When Liam O’Connor made the decision to share his furniture-making expertise through structured courses, he didn’t realize he was building the foundation for his most sustainable revenue stream. What began as occasional workshop requests evolved into comprehensive educational programs that fundamentally altered his business trajectory and market position.
The educational component started modestly, a weekend workshop here, a demonstration there, but Liam quickly noticed something unexpected. Students who learned his methods didn’t just gain skills; they became advocates for his approach to furniture making. They returned to their own workshops and communities discussing his techniques, his design philosophy, and most importantly, his commercial furniture lines. Each course participant effectively extended his marketing reach far beyond what traditional advertising could achieve.
Note: Teaching your craft doesn’t create competitors, it establishes you as the definitive authority in your field and builds trust that translates directly to sales.
By 2023, Liam had formalized his educational offerings into structured programs that attracted aspiring furniture makers from across the UK and internationally. These weren’t cursory introductions to woodworking; they were intensive experiences that covered everything from joinery fundamentals to the business strategies he’d developed during his own transition to commercial work. Students received the same quality instruction whether they enrolled in his foundational courses or his advanced masterclasses.
The commercial impact proved substantial. Workshop participants became his most qualified leads, people who understood the craftsmanship behind his furniture and valued it accordingly. Many graduates went on to purchase pieces from his commercial lines or commissioned bespoke work, having witnessed firsthand the skill and attention to detail he brought to every project. Others became referral sources, recommending his furniture to clients and colleagues.
Perhaps more significantly, the educational programs positioned Liam as an industry thought leader rather than simply another furniture maker competing for commissions. His growing reputation as an educator opened doors to collaborations, speaking opportunities, and media coverage that would have been difficult to secure through furniture sales alone. By 2026, his courses consistently sold out months in advance, creating a waiting list that itself became a marker of prestige and desirability.
The Business Model Behind the Success
A hands-on class setting illustrates how teaching and shared knowledge built momentum, skill, and credibility for commercial growth.
Three Revenue Streams That Changed Everything
Liam’s breakthrough came when he stopped relying solely on high-end commissions and built three complementary income sources that worked together to create financial stability and growth.
The bespoke commissions remained his foundation, prestigious projects like the Kensington Palace table that showcased his mastery and commanded premium prices. These one-off pieces required intensive time and client management, but they generated significant revenue per project and reinforced his reputation. He reserved these for select clients willing to invest in truly custom work.
Production furniture became his second stream. Rather than creating entirely unique pieces each time, Liam developed a refined collection of designs that could be reproduced with consistent quality. Think limited-edition runs of signature tables, cabinets, and chairs that maintained his craftsmanship standards but eliminated the design phase for each order. This approach allowed him to serve more customers at accessible price points while maintaining healthy margins through efficient processes.
Revenue Stream
Time Investment
Profit Margin
Scalability
Bespoke Commissions
Very High
40-60%
Low
Production Furniture
Medium
30-45%
Medium-High
Educational Programs
Low (after setup)
60-80%
Very High
Educational programs proved to be his most transformative decision. By packaging his knowledge into structured courses, Liam created a revenue source with minimal marginal cost once developed. A single course could serve hundreds of students simultaneously, and teaching reinforced his authority while building a community of makers who became advocates for his work. This stream required upfront investment but delivered recurring income that didn’t depend on his workshop hours.
Together, these three streams created resilience. When custom work slowed, production and education continued. When he needed workshop time for a major commission, courses ran independently. The diversification transformed his business from feast-or-famine to sustainable growth.
Building a Brand Beyond Individual Projects
Liam’s transition from project-based work to brand-building required a fundamental shift in thinking. Rather than letting each commission stand alone, he developed a consistent visual language across his work, recognizable joinery details, signature proportions, and a distinctive approach to material selection that clients could identify immediately.
He documented his process extensively through photography and video, sharing the story behind techniques rather than just finished pieces. This transparency built trust and positioned him as an educator, not merely a maker competing on product alone.
The brand extended beyond furniture into a recognizable philosophy: accessible craftsmanship without compromise. Liam standardized his communication style, from workshop descriptions to customer interactions, ensuring every touchpoint reinforced this core message.
Most critically, he stopped presenting himself as a tradesperson taking orders and started positioning as a craftsman with a distinct point of view. Clients weren’t just buying a table, they were investing in Liam’s approach to furniture making, his standards, and the community he’d built around quality work at accessible prices.
Lessons for Aspiring Furniture Makers
Liam’s transformation from craftsman to commercial success wasn’t luck, it was a series of deliberate decisions any furniture maker can learn from. The path he forged offers a blueprint that’s especially relevant now, when quality handmade furniture commands premium prices but makers struggle to scale beyond one-off projects.
The first lesson is radical honesty about what you do best. Liam didn’t try to be everything to everyone. He identified his signature style, clean lines, impeccable joinery, timeless design, and built everything around that core competency. In 2026, when customers can buy disposable furniture anywhere, your distinct voice becomes your greatest asset. Know it, own it, and let it guide every business decision.
Start small, test often, and listen to what actually sells. Liam didn’t leap straight into production furniture. He tested designs through bespoke commissions, refined them based on customer feedback, then selected pieces with broad appeal for commercial development. This approach minimizes risk while building proof that your designs resonate.
For those ready to make the shift, Liam’s journey suggests this sequence:
Master your craft through diverse bespoke projects, build your skill foundation first.
Identify which designs generate consistent interest and could be streamlined for efficiency.
Develop systems for repeatable quality, jigs, templates, and documented processes.
Build a teaching or content strategy to establish authority and attract customers.
Create multiple income streams rather than depending solely on commissions or production.
Invest profits back into better tools and workspace efficiency, not just expanding too quickly.
The teaching component deserves special emphasis. Liam’s courses didn’t just generate revenue; they created a community of advocates who understood his approach and valued his expertise. Sharing knowledge positions you as an authority, builds trust, and often reveals new business opportunities you hadn’t considered.
Perhaps most importantly, maintain your standards even when scaling up. The makers who succeed commercially in 2026 aren’t those who compromise quality for volume, they’re those who figure out how to deliver excellence more efficiently. Liam proved that Ford’s accessibility doesn’t require Ford’s assembly line if you’re strategic about what you produce and how you position it.
The ‘Phil O’Connor Ford’ concept, though born from a search query misunderstanding, captures something essential about Liam O’Connor’s achievement. He’s proven that quality furniture making doesn’t have to choose between artistic integrity and commercial success. Like Ford’s revolution in automobiles, Liam democratized access to exceptional craftsmanship without diluting the skill involved.
His journey from Kensington Palace commissions to a thriving commercial operation shows there’s a viable path for dedicated makers who are willing to think beyond the next bespoke project. The combination of production efficiency, educational authority, and strategic business thinking created a sustainable model that works in 2026’s competitive market.
For aspiring furniture makers, Liam’s story offers more than inspiration, it provides a tested blueprint. Whether you’re struggling with pricing, wondering how to scale beyond commissions, or seeking to establish your own authority, his approach demonstrates that traditional craftsmanship can support a modern career. The key lies not in compromising standards but in rethinking how those standards reach your audience.
Transform your property’s narrative after pest treatment by commissioning statement furniture pieces that immediately signal renewal and investment. Custom bookcases, dining tables, or console units crafted specifically for challenging spaces communicate to prospective buyers that the property has received thoughtful attention beyond mere remediation.
Deploy bespoke furniture strategically in areas previously affected by pest activity. A handcrafted kitchen island or fitted wardrobes demonstrate tangible commitment to the property’s future, psychologically distancing buyers from past issues while showcasing your investment in quality materials and craftsmanship.
Select timber species and finishes that emphasize freshness and durability. Light oak, ash, or maple with contemporary protective treatments create visual brightness and suggest cleanliness, counteracting any lingering concerns about property condition. Commission pieces with visible joinery or distinctive design elements that become conversation focal points during viewings.
Position custom furniture to redefine room purpose and flow. A bespoke window seat or reading nook transforms a previously problematic area into a desirable feature, actively rewriting the room’s story in buyers’ minds.
The challenge of selling a house with a rat infestation or other pest history requires more than professional treatment certificates. Prospective buyers need visual, tangible evidence that the property represents a sound investment. Custom furniture serves this dual purpose: it addresses practical staging needs while functioning as physical proof of your confidence in the property’s condition and future value, transforming potential objections into selling advantages.
Understanding the Post-Pest Control Challenge
The Stigma of Past Pest Problems
When a property has undergone pest control treatment, even successful remediation leaves an invisible mark on buyer psychology. Prospective purchasers often imagine lingering problems beneath surfaces, questioning what damage remains hidden behind walls or under floorboards. This hesitation translates directly into reduced offers or extended time on market, regardless of how thoroughly the issue was resolved.
The challenge isn’t just about eliminating pests; it’s about eliminating doubt. Buyers need tangible evidence that the property has been transformed, not merely treated. Visual cues become extraordinarily powerful in this context, signaling investment and care that extends beyond basic maintenance.
This is where bespoke furniture enters as a strategic solution rather than simple decoration. When a seller introduces custom-crafted pieces into a space previously affected by pests, it communicates renewal through craftsmanship. A beautifully made sideboard or handcrafted bookshelf demonstrates confidence in the property’s condition. After all, who invests in quality woodwork for a compromised space? This psychological shift transforms buyer perception from skepticism to appreciation, creating a narrative of restoration and quality that photographs beautifully and resonates emotionally during viewings.
Why Standard Furniture Falls Short
Standard furniture from big-box retailers often works against your staging goals after pest treatment. Generic pieces lack the distinctive character needed to shift buyer attention from past concerns to present quality. When potential purchasers enter a treated property, they’re already looking for reassurance that the space has been genuinely renewed and invested in.
Mass-produced furniture communicates convenience rather than commitment. Its uniformity doesn’t tell a story of transformation or signal the fresh start you want buyers to perceive. In contrast, handcrafted pieces immediately showcase visible craftsmanship through joinery details, wood grain selection, and finishing quality that buyers can see and touch. This tangible evidence of skilled work creates a powerful psychological shift, demonstrating that substantial resources and care have been invested in the property’s renewal. The distinction between machine-made uniformity and human craftsmanship becomes your most persuasive tool in overcoming buyer hesitation.
The Strategic Role of Bespoke Furniture in Property Recovery
Bespoke furniture pieces with visible craftsmanship create focal points that signal quality and careful property investment.
Creating a Fresh Narrative Through Craftsmanship
When potential buyers walk through a property, their eyes naturally gravitate toward standout pieces that command attention. This psychological principle becomes your greatest asset when repositioning a home after pest control. A handcrafted walnut console table in the entryway or a stunning oak dining set doesn’t just fill space—it creates an immediate focal point that redirects the entire conversation.
Consider the experience of Sarah, a property stager who commissioned a bespoke bookshelf system for a treated Victorian terrace. “Before the installation, viewings felt defensive,” she recalls. “After we added the custom shelving with visible dovetail joints and hand-planed surfaces, buyers spent fifteen minutes discussing the craftsmanship. The pest treatment became a footnote in their notes rather than the headline.”
The transformation works because quality speaks its own language. When someone runs their hand across a perfectly finished surface or examines the precision of mortise and tenon joints, they’re experiencing tangible evidence of investment and care. This sensory engagement creates new memories that override abstract concerns about the property’s history.
Strategic placement amplifies this effect. Position statement pieces in transition spaces where buyers naturally pause—entryways, landings, or kitchen islands. These crafted elements become conversation anchors, allowing estate agents to guide discussions toward present excellence rather than past challenges. The visible investment in bespoke furniture demonstrates that the property’s current chapter is defined by quality, renewal, and thoughtful attention to detail.
Demonstrating Investment and Care
When potential buyers walk through a property, they’re reading a story written in every detail. After pest control treatment, you need to author a new chapter that speaks unambiguously of renewal and quality investment. Bespoke furniture becomes your most eloquent narrator in this endeavor.
Consider the experience of Sarah, an estate agent who staged a Victorian terrace following termite treatment. She commissioned a local woodworker to create a stunning oak console table for the entrance hall, alongside custom built-in shelving for the living room. The craftsmanship was immediately apparent: hand-cut dovetail joints, carefully selected timber grain, and a flawless finish that caught the light beautifully. Prospective buyers didn’t just notice the furniture; they commented on it enthusiastically during viewings. The conversation shifted from “what happened here?” to “who made this beautiful piece?”
This transformation happens because bespoke furniture carries unmistakable signals. The financial investment required to commission custom pieces demonstrates confidence in the property’s integrity. The careful attention to measurements, materials, and finishes mirrors the thoroughness applied to pest eradication and remediation. When buyers see quality craftsmanship, they unconsciously associate that same standard of care with the less visible work that’s been done.
Moreover, custom furniture creates focal points that redirect attention strategically. A handcrafted dining table or a built-in window seat becomes the memorable feature buyers discuss afterward, rather than dwelling on past pest issues. You’re essentially giving them a positive anchor point, a tangible expression of the property’s renewed status.
Selecting the Right Bespoke Pieces for Maximum Impact
Statement Pieces That Command Attention
When buyers enter a previously treated property, their attention naturally gravitates toward potential problem areas. Strategic placement of commanding furniture pieces redirects this focus entirely, creating new visual anchors that tell a story of renewal and investment.
A substantial custom oak dining table becomes the undeniable centerpiece of your main living space. Its handcrafted presence speaks to permanence and quality, suggesting a home where owners invest in lasting value rather than quick fixes. One recent staging project featured a live-edge dining table that became the talking point of every viewing, with prospective buyers photographing it repeatedly while barely mentioning the property’s history.
Entryway consoles establish immediate first impressions, positioning bespoke craftsmanship as the opening statement before buyers form opinions about anything else. A thoughtfully designed piece with dovetail joinery and hand-applied finishes demonstrates attention to detail that permeates the entire property.
Kitchen islands transform functional spaces into showcases of artisan quality. When buyers encounter custom-built furniture that clearly required skilled craftsmanship and significant investment, their mental narrative shifts from past problems to present possibilities. These statement pieces don’t hide history; they overshadow it with tangible evidence of a home’s current caliber.
Built-In Solutions That Signal Permanence
After pest treatment has successfully addressed structural concerns, built-in solutions become powerful ambassadors for your property’s renewed integrity. Unlike freestanding pieces that buyers might perceive as strategically placed to hide problems, fitted wardrobes, bespoke shelving units, and integrated cabinetry demonstrate genuine investment in the space.
Consider the transformation achieved by Sarah, a property developer who commissioned floor-to-ceiling oak shelving for a Victorian terrace following termite remediation. The integrated units, crafted with visible joinery techniques including traditional dovetails and mortise-and-tenon joints, spoke directly to the home’s structural soundness. Buyers could see the quality timber, touch the solid construction, and understand that no one invests in such permanent fixtures without complete confidence in the underlying structure.
Built-in solutions work particularly well in areas where pest activity was previously concentrated. A fitted wardrobe system in a bedroom once affected by woodworm becomes evidence of thorough treatment and renewal. The very act of permanently installing quality joinery demonstrates that the property owner trusts the space enough for substantial financial commitment.
When showcasing these installations, highlight the craftsmanship details. Point out the precision of fitted panels, the quality of timber selection, and the attention to finish work. These elements communicate far more than surface-level staging; they signal that this property has been thoughtfully restored and deserves renewed confidence from potential buyers.
Working With a Furniture Maker: The Consultation Process
The furniture-making process demonstrates the level of care and quality that transforms a property’s narrative.
Communicating Your Property’s Story
When commissioning bespoke furniture for a property with pest control history, clear communication transforms craftsmanship into strategic storytelling. Start by sharing the property’s narrative honestly with your chosen craftsperson. Explain that the space has undergone professional pest remediation and now represents a fresh beginning. This context helps them understand their work isn’t merely decorative but serves as tangible evidence of renewal and quality investment.
Discuss your staging goals explicitly. Are you targeting young professionals seeking modern minimalism, or families wanting warm, inviting spaces? Share details about the property’s architectural features, natural lighting, and dimensions. One estate agent I worked with provided detailed photographs and measurements, which allowed me to design a console table that perfectly framed a newly restored Victorian hallway, drawing attention away from previous concerns toward architectural beauty.
Be specific about materials and finishes. If you’re emphasizing the property’s freshness, request light woods with natural oils that showcase clean, contemporary craftsmanship. Explain which rooms need focal pieces versus subtle accents. The craftsperson can then design furniture that guides buyer attention strategically, creating memorable impressions while subtly demonstrating that this property has received thoughtful, quality attention throughout.
Timeline and Budget Considerations
Property timelines and furniture creation schedules require careful coordination. Most bespoke furniture projects need four to eight weeks from design consultation to delivery, depending on complexity and workshop availability. For property sellers working with estate agents, this means initiating furniture commissions immediately after pest control treatment concludes and clearance certificates are obtained.
Budget-wise, staging with bespoke pieces offers strategic value beyond generic rental furniture. A single statement dining table or console piece typically costs between £800-2,500, yet signals substantial property investment to prospective buyers. One successful staging project involved a homeowner who commissioned a contemporary hallway bench after termite treatment. The £1,200 investment, combined with the visible newness of custom craftsmanship, helped shift buyer perception entirely, resulting in offers exceeding the asking price by £15,000.
For those managing tighter budgets, consider focusing on one hero piece for the primary viewing area rather than furnishing multiple rooms. Many furniture makers offer payment plans or scaled project options, allowing you to balance quality craftsmanship with realistic staging budgets. Remember, the goal is creating renewal signals that overcome pest-related hesitation while demonstrating your commitment to property quality.
Material Choices That Reinforce Quality and Cleanliness
Light Woods and Natural Finishes
When a property has undergone pest control treatment, prospective buyers often harbour lingering concerns about cleanliness and structural integrity. This is precisely where timber choice becomes psychologically powerful. Pale woods like light oak, ash, and bleached maple work beautifully to counter these associations because they visually communicate renewal and openness.
Natural finishes possess an inherent honesty that resonates with buyers seeking reassurance. Unlike dark, heavy woods that can feel oppressive or conceal imperfections, lighter timbers create an airy, transparent quality throughout a space. One student at our workshops shared how she transformed a previously infested property by crafting simple ash floating shelves and a pale oak console table for the entrance hall. The fresh, clean grain patterns immediately shifted the narrative from problem to possibility.
The science behind this is straightforward: lighter tones reflect more natural light, making rooms appear larger and more welcoming. When paired with matte or satin oil finishes rather than heavy varnishes, these pieces demonstrate meticulous care and attention to quality. Buyers instinctively recognise that someone has invested thoughtfully in renewal, not merely covered up past issues.
Visible Joinery and Transparent Craftsmanship
Exposed joinery speaks volumes about furniture quality, particularly in homes recovering from pest issues. When dovetails, mortise-and-tenon joints, and finger joints remain visible, they invite prospective buyers to examine craftsmanship up close. This transparency becomes powerful evidence that new furnishings represent genuine investment rather than superficial coverup.
Traditional joinery techniques create structural integrity that buyers can literally see and touch. One staging project featured a dining table with through-tenons that became a conversation focal point during viewings. Buyers appreciated understanding how pieces were constructed, which naturally extended trust to the entire property.
This openness directly counters the secrecy buyers fear after pest treatment. Visible joints demonstrate nothing is hidden, while showcasing the skill involved in creating each piece. The approach transforms furniture from decorative elements into trust-building testimonials of quality and transparency throughout the home.
Real Success Story: Transforming a Victorian Terrace
When Sarah inherited her grandmother’s three-bedroom Victorian terrace in Islington, she discovered an unwelcome legacy alongside the period features: extensive woodworm damage in the original floorboards and skirting boards. After comprehensive pest control treatment and structural repairs costing nearly £8,000, she faced a daunting challenge. Early viewings revealed a clear pattern—potential buyers fixated on the property’s pest history despite professional certification of complete eradication.
The initial market response was disheartening. Even with a competitive asking price, viewers expressed concerns about hidden damage and potential recurrence. Sarah’s estate agent noted that seven out of ten viewings ended with questions about “what else might be lurking” rather than discussions about making offers.
Understanding that she needed to shift the narrative from historical problems to present quality, Sarah invested in a strategic staging approach centered on bespoke furniture. She commissioned a local craftsperson to create three statement pieces: a solid oak console table for the entrance hall, floating shelves in reclaimed elm for the living room, and a bespoke window seat with integrated storage for the main bedroom.
Each piece was crafted to highlight the property’s architectural strengths while demonstrating a clear commitment to quality materials and expert craftsmanship. The console table, positioned immediately at entry, became an instant conversation starter. Rather than viewers entering with trepidation about past pest issues, they commented on the beautiful grain pattern and asked about the maker.
The transformation in buyer response was remarkable. The next three viewings resulted in two offers above asking price. Feedback shifted dramatically—prospective buyers now referenced “lovingly maintained character home” and “investment in quality finishes” rather than expressing pest-related concerns.
Sarah’s experience illustrates a powerful principle: bespoke furniture doesn’t just fill space, it rewrites the story a property tells. By investing visibly in quality craftsmanship, she provided tangible evidence that the home had been thoughtfully renewed, transforming buyer perception from suspicious to confident.
Strategic placement of bespoke furniture in period properties creates a narrative of thoughtful renovation and quality investment.
Beyond Staging: Educational Value for Aspiring Woodworkers
Understanding the strategic role of custom pieces in post-treatment staging opens valuable learning opportunities for anyone interested in property renovation or woodworking. When you observe how professional bespoke furniture creation transforms a space recovering from pest issues, you gain insight into design principles that apply to countless renovation scenarios.
For aspiring woodworkers and DIY enthusiasts, this specific challenge illustrates how furniture serves purposes beyond aesthetics. A well-crafted console table or statement bookshelf demonstrates structural integrity, material quality, and finishing techniques that signal permanence and care—precisely what buyers need to see after pest treatment. This knowledge empowers you to approach your own projects with strategic thinking, considering not just what looks appealing, but what communicates reliability and investment.
Property renovators benefit from understanding joinery methods and wood selection that indicate durability. When you recognize why certain timber species resist moisture and deterioration better than others, or how proper finishing protects against future damage, you make smarter purchasing decisions for your staging needs.
Through furniture-making education, students discover these principles firsthand, creating pieces that solve real-world challenges. Whether you’re staging a property, furnishing your own home, or building skills for professional work, understanding the craftsmanship behind quality furniture transforms how you evaluate and implement design solutions. This knowledge becomes particularly valuable when furniture must do more than fill space—it must rebuild confidence and demonstrate transformation.
Transforming a property after pest control presents unique challenges, but bespoke furniture offers a powerful dual solution that addresses both practical staging needs and psychological perception. Custom-crafted pieces signal renewal and investment, demonstrating to potential buyers that the property has been thoughtfully restored rather than merely treated. This strategic approach converts a perceived liability into an opportunity for differentiation in competitive markets.
Consider Sarah, a property stager who commissioned three statement pieces for a Victorian terrace following extensive pest treatment. Her decision to showcase handcrafted furniture in the entrance hall, living room, and master bedroom created immediate visual anchors that shifted buyer attention toward quality and craftsmanship. The investment paid dividends when the property sold 18% above asking price, with multiple buyers specifically commenting on the furniture’s presence creating confidence in the home’s condition.
The marriage of traditional woodworking techniques and strategic home staging represents more than aesthetic enhancement. It becomes tangible evidence of care and commitment to excellence. Whether you’re exploring furniture-making as a professional opportunity or seeking solutions for property challenges, understanding how custom craftsmanship creates value opens new perspectives. We encourage you to explore educational resources that deepen your knowledge of bespoke furniture creation and its transformative applications in real estate contexts.
Nestled behind imposing security gates in London’s most exclusive street, Kensington Palace Gardens represents the pinnacle of British craftsmanship and royal heritage. When you step inside this historic location to deliver bespoke furniture, you’re not just completing a commission—you’re joining centuries of artisans who’ve shaped spaces for royalty and dignitaries.
The furniture pavilion project at Kensington Palace Gardens demanded precision that few woodworkers ever encounter. Every joint had to be flawless, every finish museum-quality, every measurement exact to the millimeter. This wasn’t furniture that would sit unnoticed in a corner; it would bear scrutiny from some of the world’s most discerning eyes, in rooms where history unfolds daily.
What makes such projects remarkable isn’t just their prestigious location, but what they teach about the craft itself. Working on royal commissions reveals truths about woodworking that apply whether you’re building a garden shed or a palace piece: quality compounds over time, shortcuts reveal themselves eventually, and true craftsmanship lies in the details no one sees but everyone feels.
This behind-the-scenes look at the Kensington Palace Gardens project reveals how traditional techniques meet modern expectations, how a single craftsperson approaches seemingly impossible standards, and most importantly, how the principles behind royal-level work can elevate your own furniture making. The gap between amateur and master isn’t talent—it’s understanding what excellence actually requires.
Kensington Palace Gardens: Where History Meets Modern Craftsmanship
Kensington Palace’s historic architecture and formal gardens provide the prestigious setting for exceptional furniture craftsmanship.
The Garden Pavilion Project
The Garden Pavilion at Kensington Palace presented a fascinating challenge that goes far beyond typical furniture making. This historic structure needed bespoke seating that would serve visitors while respecting the architectural heritage and withstanding the unique demands of a public heritage site.
Unlike residential projects where furniture lives in controlled environments, or commercial spaces with regular replacement cycles, heritage site furniture must meet extraordinarily demanding criteria. Every piece needs to complement centuries-old architecture without competing with it, endure constant public use by thousands of visitors annually, and maintain its beauty despite exposure to varying weather conditions and humidity levels. The furniture must also align with strict conservation guidelines that govern any additions to protected historic properties.
The commission called for benches that would invite visitors to pause and appreciate the palace gardens, yet remain visually understated enough to honor the setting’s historical significance. This meant considering not just aesthetics and comfort, but durability factors that residential furniture makers rarely encounter. Would the joinery withstand daily use by hundreds of people? Could the timber selection handle seasonal moisture changes in an outdoor setting? How would the finish weather over time in a location where replacement isn’t a simple option?
These questions informed every design decision, from timber species selection to joinery techniques and finish application. The project became a masterclass in thinking holistically about furniture’s entire lifecycle, considering factors like maintenance accessibility and long-term structural integrity. For any aspiring furniture maker, understanding these additional layers of complexity separates competent craftsmanship from exceptional work that stands the test of time in demanding environments. This commission demonstrated how traditional skills adapt to meet contemporary conservation requirements while honoring historical context.
Designing Furniture for a Royal Setting: The Process Behind the Pavilion Table
Material Selection and Historic Authenticity
Working on a project within the historic grounds of Kensington Palace Gardens presented unique challenges in material selection. The key was finding timber that would complement the surrounding Georgian and Victorian architecture while withstanding modern outdoor use.
We selected European oak for its historical authenticity and exceptional durability. This species has been the backbone of British craftsmanship for centuries, appearing in everything from medieval timber frames to naval shipbuilding. The oak’s natural tannins provide inherent weather resistance, making it ideal for outdoor pavilion structures exposed to London’s variable climate.
One of our advanced students, Margaret, participated in the material sourcing process and learned how quarter-sawn oak offers superior stability compared to plain-sawn cuts. This traditional milling method, though more wasteful of timber, produces boards with minimal movement as they age, a critical consideration when crafting furniture for a royal commission where longevity matters as much as beauty.
We also considered English sweet chestnut as an alternative, which historically served similar purposes to oak in British construction. However, oak’s deeper historical connection to palace architecture made it the authentic choice. The decision process taught our team an invaluable lesson: material selection isn’t merely about finding what works technically but understanding what honors the context and story of a place. This approach transforms functional furniture into pieces that truly belong in their environment.
Joinery Techniques Worthy of Palace Gardens
Creating structures worthy of palace gardens demands joinery techniques that have stood the test of centuries. For the Kensington Palace Gardens pavilion, traditional methods formed the backbone of construction, ensuring both structural integrity and timeless aesthetic appeal.
Mortise and tenon joints anchored the primary framework. This technique, dating back millennia, involves cutting a projecting tenon on one piece that fits precisely into a corresponding mortise cavity on another. The beauty lies in its simplicity and strength—when executed properly, the joint becomes stronger than the wood itself. For aspiring furniture makers, mastering this fundamental join opens doors to countless projects, from simple side tables to complex garden structures.
The pavilion also showcased through-wedged tenons at key structural points. Here, the tenon passes completely through the mortise, with hardwood wedges driven into saw cuts at the tenon’s end. As the wedges spread the tenon, they create an almost unbreakable mechanical lock. This visible joinery becomes a decorative feature, celebrating honest construction rather than hiding it.
For the roof assembly, traditional pegged joints secured the rafters. After creating mortise and tenon connections, oak dowels were driven through pre-drilled holes, pinning the joints permanently. This method requires no metal fasteners, allowing the wood to move naturally with seasonal humidity changes without compromising strength.
One former student who worked on the project shared how practicing these techniques on smaller workshop pieces built the confidence and precision needed for such a prestigious commission. The pavilion demonstrates that traditional joinery isn’t merely historical preservation—it’s a practical approach to creating furniture and structures designed to last generations, making these time-honored methods worthy investments for any serious craftsperson.
Traditional joinery techniques ensure furniture pieces achieve the durability and beauty required for prestigious commissions.
Lessons from Royal Commissions: What Every Furniture Maker Can Learn
Palace-standard finishing techniques transform quality materials into heirloom furniture pieces.
Elevating Your Own Projects with Palace-Standard Techniques
Working on a project for Kensington Palace Gardens teaches invaluable lessons that translate beautifully to any workshop, regardless of size or budget. The principles of precision, considered design, and meticulous finishing remain constant whether you’re creating a garden pavilion for royalty or a dining table for your own home.
Start by adopting the mindset of designing for longevity. Before cutting a single piece of timber, consider how your furniture will weather time and use. This means selecting appropriate joinery methods—mortise and tenon joints for structural integrity, dovetails for drawers that will open smoothly for decades. These techniques require patience to master, but even moderately skilled woodworkers can achieve professional results with practice and proper marking out.
The palace project demonstrated that finishing quality separates competent work from exceptional pieces. Take time between assembly stages to sand progressively through grits, always working with the grain. Apply finishes in thin, multiple coats rather than rushing with heavy applications. One of our students, Sarah, transformed her approach after observing this principle during a workshop session. Her cherry sideboard, initially destined for heavy stain to hide inconsistencies, instead received careful surface preparation and a simple oil finish that showcased the timber’s natural beauty—exactly the philosophy applied at palace-level commissions.
Consider proportions with the same care given to historic settings. Measure your space thoroughly, create scaled drawings, and build mock-ups from inexpensive materials when tackling unfamiliar designs. This process, standard in professional workshops, prevents costly mistakes and ensures your finished piece harmonizes with its environment. The attention to detail invested in planning invariably shows in the final result, bridging the gap between amateur enthusiasm and professional execution.
Training the Next Generation: From Student Projects to Palace Commissions
Every master craftsperson begins somewhere, and the journey from first tentative chisel work to creating pieces worthy of palace gardens exemplifies what’s possible with dedicated learning and expert guidance. At Authentic Furniture UK Classes, this transformation happens regularly, as students progress from fundamental joinery techniques to undertaking their own commissioned projects.
Take Sarah Mitchell, who joined classes three years ago with no woodworking experience beyond flat-pack assembly. Her first project was a simple garden bench using traditional mortise and tenon joints. Today, she runs a successful bespoke furniture business specializing in outdoor pieces for boutique hotels. The progression wasn’t accidental. Through structured learning that emphasized both historical techniques and practical problem-solving, Sarah developed the confidence to tackle increasingly complex designs. Her breakthrough came when she completed a reproduction Lutyens bench, mastering the curved arms and precise joinery that define quality garden furniture.
Then there’s Marcus Chen, a former architect who sought hands-on skills to complement his design work. Starting with weekend workshops focused on tool sharpening and wood selection, he gradually moved into advanced courses covering proportions, finishing techniques, and weatherproofing methods essential for outdoor furniture. Within eighteen months, Marcus secured his first commission for a private garden pavilion in Surrey, applying principles learned from studying projects like the Kensington Palace installation. His client specifically requested the traditional joinery methods he’d learned, valuing the durability and authenticity they provide.
The teaching philosophy centers on demystifying complex projects by breaking them into manageable steps. Students learn that even prestigious commissions follow the same fundamental principles mastered in class: accurate measurements, sharp tools, understanding wood movement, and patient execution. This approach builds genuine competence rather than superficial familiarity.
What makes these transformations possible is the emphasis on real-world application. Rather than producing endless practice joints that end up as firewood, students create functional pieces from their earliest lessons. A simple garden stool becomes both a learning tool and a usable item, reinforcing the connection between skill development and practical outcomes. This methodology ensures that graduates leave equipped not just with techniques, but with the confidence and portfolio pieces necessary to pursue their own commissions, whether for neighbors’ gardens or more ambitious projects beyond.
The journey from admiring a prestigious project like the Kensington Palace Gardens furniture pavilion to creating your own exceptional pieces is more achievable than you might imagine. The craftspeople who contributed to this royal commission weren’t born with extraordinary abilities—they developed their skills through dedicated practice, structured learning, and guidance from experienced mentors who understood both traditional techniques and contemporary applications.
What sets apart truly remarkable furniture makers is their commitment to continuous learning and their willingness to invest time in mastering fundamental skills before advancing to complex projects. The intricate joinery, precise hand-tool work, and attention to detail visible in palace-worthy pieces stem from hundreds of hours of deliberate practice, supported by expert instruction that reveals the nuances often missed when working alone.
Today’s aspiring craftspeople have unprecedented access to the same knowledge that shapes professional furniture makers. Comprehensive courses taught by masters with hands-on experience in prestigious commissions provide the foundation you need, breaking down advanced techniques into manageable steps while maintaining the high standards that define exceptional craftsmanship.
Whether you dream of contributing to historic restorations, building bespoke pieces for discerning clients, or simply elevating your personal projects to professional quality, the path forward begins with a single decision. Explore furniture-making courses that emphasize both traditional hand skills and practical business knowledge. Start your journey today, and discover how dedication combined with expert guidance can transform your aspirations into tangible, beautiful works that stand the test of time.
Our 12-month professional furniture-studentmaking is currently immersed in the Laminating & Veneering module, where the focal point is a challenging project – a curved wall cabinet. This wall-mounted piece serves as a comprehensive exercise in mould-making, template creation, jig making, as well as the meticulous preparation of laminate and hand-cut veneer.
The project’s complexity peaks with the inset-hanging of a door featuring a double curvature front, posing intriguing challenges in selecting the right ironmongery. Our student commenced by meticulously hand-drafting the entire project on a drawing board and then translating it onto working rods, which were pivotal in crafting templates for moulding.
Using these templates, she skillfully pressed hand-cut laminations of English Walnut in the vacuum bag press. Subsequently, another set of templates played a key role in shaping the side panels. A noteworthy challenge emerged in determining how to cut the housing joint into the curved sides for the shelves. Overcoming this hurdle involved creating a sizable jig.
After spokeshaving the curved side panels and ensuring a precise fit, the next steps will involve preparing and installing the back panel, crafted from the stunningly beautiful spalted Walnut. The outcome was an exquisite piece made professionally with precision and elegance.
At Authentic Furniture UK Classes, our professional furniture-making students consistently produce exceptional work that showcases their craftsmanship and creativity. Each piece is a testament to their dedication and skill, blending traditional techniques with contemporary design. Under the expert guidance of our seasoned instructors, students master the art of fine woodworking, resulting in beautifully crafted furniture that reflects both precision and innovation. Their creations not only meet high standards of quality and aesthetics but also demonstrate their potential to excel in the furniture-making industry.
Milling and Drying Timber
The dream of converting our timber for bespoke furniture and student projects finally materialized this year as we set out to mill and dry our first logs of flamed beech back in March. Once milled, I carefully stacked the boards, allowing them to air-dry while shielded from the elements. This patient process spans up to 2 years, aiming for an ideal moisture content of about 18%.
Kiln Dried
In 2018, I had two logs of beech milled at a sawmill and transported to the workshop. These logs are now entering the next phase – drying in our timber drying kiln. Our efficient system completes this step in 2-3 weeks, reducing the timber’s moisture content to an optimal 8%, perfect for interior woodwork and furniture.
The flamed beech I convert into kiln-dried timber is primarily reserved for the Moroubo Workbench Course. The exquisite marble figured grain of the flamed beech log, cut back in March at an impressive 4m (13ft) length, promises to yield stunning workbench tops. With only three more oak logs to process, the workshop is buzzing with anticipation.
Available Discounts for Multiple Core Skills Courses
Book 2 Courses – £15 discount
Book 3 Courses – £30 discount
Book 4 Courses – £45 discount
LSF Voucher Codes
Enter the voucher code at our checkout page.
Waiting List
If a class reaches full capacity, feel free to enlist on the waiting list. Simply click the “Join Waiting List” button next to the course heading.
Cancellations and Refunds
Upon making a reservation, you acknowledge and agree to adhere to our refund policy. Kindly ensure you have thoroughly read and comprehended the policy before finalizing your booking.
Cancellations and Refunds in Detail
As a small school dedicated to imparting our expertise, we strive for flexibility while emphasizing the importance of understanding the limitations imposed by our small class sizes. Recognizing that last-minute changes can adversely impact our program, we may need to cancel classes if participant numbers are insufficient. Consequently, we maintain a stringent stance on enforcing our cancellations or refunds policy, regardless of individual circumstances. Your comprehension and cooperation are greatly appreciated.
Reminders
If you wish to cancel or change your date, kindly submit your request in writing.
Your course fee will be refunded only if you provide written notice of your intention to cancel at least 7 days before the course’s start date.
In most cases, we aim to refund your course fee in full, but please note that multiple cancellations resulting in two or more refunds will incur a 5% admin fee, covering charges imposed by our payment processing company.
When we request a refund, the company retains all original processing fees.
Refunds will not be given for cancellation notices received with less than 7 days’ notice or after the course has commenced.
To reschedule your course, please provide at least 7 days’ notice. We do not guarantee alternative dates, and providing them is at our discretion.
If you wish to reschedule within 7 days of the course start and we find a replacement, you may choose an alternative date. However, if we are unable to fill the spot, rescheduling is not possible, and the course fee will be forfeited.
EXCEPTIONS: If severe illness prevents you from taking your place, we require a doctor’s note, PCR test, or similar paperwork for consideration of alternative dates.
CANCELLATION BY US: We reserve the right to cancel a course. In such cases, you will be informed of available vacancies or alternative dates. If you opt not to book an alternative date, any course fees paid will be refunded in full. We are not responsible for refunding fees incurred by you for pre-booked travel, parking, or accommodation.
Terms and Conditions
Delivery Information
Gift vouchers will be sent to the email address provided by the purchaser, allowing them to forward the voucher to the recipient at their preferred time.
Non-Refundable
LSF gift vouchers are non-refundable and cannot be swapped for cash or alternative forms of payment once they have been purchased.
Transferable
Should the intended recipient be unable to utilize the voucher, it is permissible to transfer it to someone else.
Validity Period
Vouchers have a validity period of up to 12 months from the date of purchase. Please ensure redemption takes place within this timeframe.
Cancellation Policy
You possess the statutory right to cancel your voucher(s) within 14 days of the purchase date. If you intend to cancel, kindly notify us [here]. While we strive to process refunds within 24 hours, please allow up to 10 days for the funds to be credited to the purchaser’s account.
Note: A cancellation request will only be considered if gift vouchers have not been redeemed for any of our classes or workshops.
The London School of Furniture Making reserves the right to alter these terms and conditions at any time, with the terms applicable at the time of purchase taking precedence. For any queries or clarifications, please don’t hesitate to reach out to us.
These terms and conditions don’t affect your statutory rights.