How to Choose the Right Furniture Construction Materials for Strength and Beauty
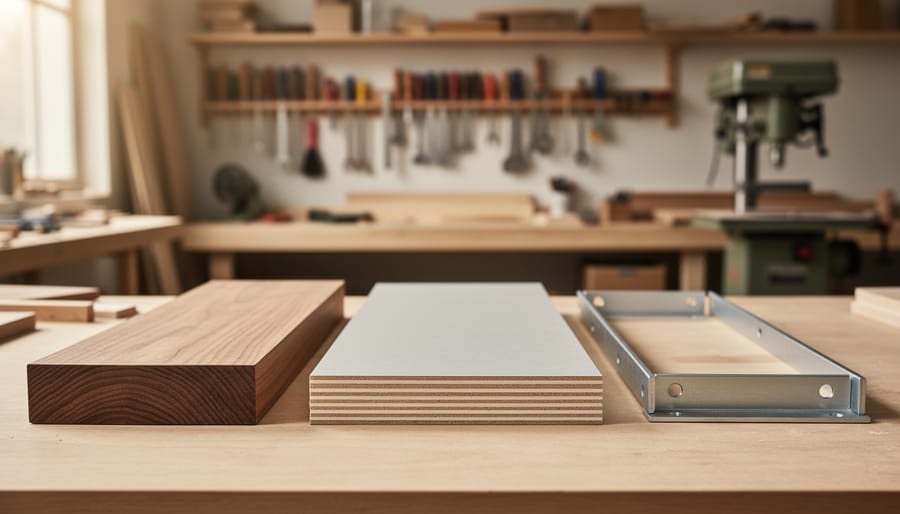
Choosing the right construction material determines whether your furniture project will survive daily use or fall apart in months. The foundation of successful furniture making rests on three core material categories: solid wood for structural strength and timeless appeal, manufactured boards for stability and cost efficiency, and metal or composite elements for contemporary design and specialized applications. Understanding the working properties, preparation requirements, and ideal applications of each material transforms raw supplies into furniture that stands the test of time.
I’ve watched hundreds of students walk into my workshop convinced they needed the most expensive hardwood for every project, only to discover that a well-chosen plywood often delivers superior results for cabinets and built-ins. The material selection process isn’t about prestige. It’s about matching performance characteristics to your specific design requirements, skill level, and budget constraints.
The furniture construction landscape in 2026 offers more options than ever before. Traditional oak and walnut remain workshop staples, but engineered materials like bamboo composites and cross-laminated timber now provide sustainable alternatives with predictable behavior. Meanwhile, metal frames and acrylic panels enable designs that would be impossible with wood alone.
Most beginners stumble not because they lack skill, but because they start with materials that fight them at every step. Dense tropical hardwoods punish dull tools. Particle board crumbles under incorrectly placed screws. Even experienced makers benefit from a systematic approach to material selection, as outlined in our first furniture guide where proper material choices set the stage for confident construction. What follows is a practical framework for evaluating, preparing, and working with furniture construction materials that actually suit your project goals.
Essential Materials in Furniture Construction
Solid Timber: The Foundation of Fine Furniture
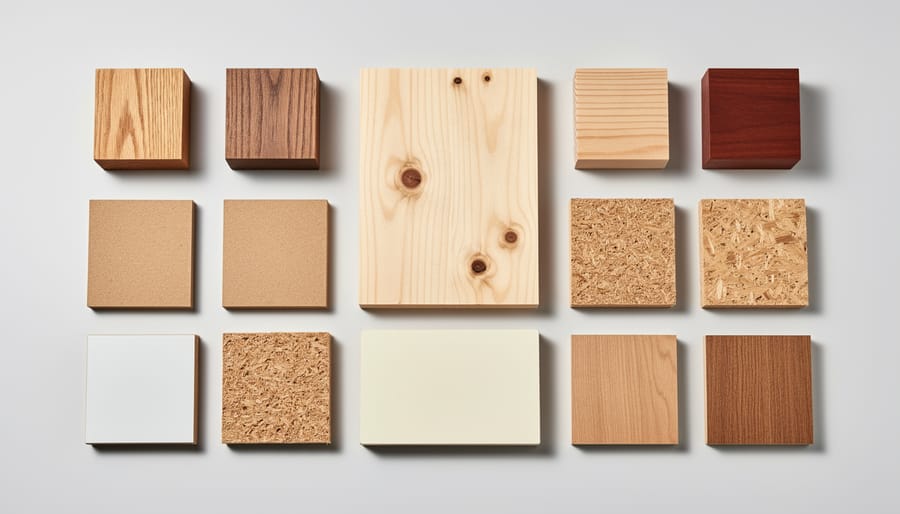
Solid timber remains the most prized furniture material because it brings unmatched character and structural integrity to every piece. The fundamental distinction between hardwoods and softwoods shapes everything from your cutting techniques to the longevity of the finished work.
Hardwoods, oak, walnut, cherry, maple, come from deciduous trees and typically offer greater density and durability. Their tight grain structure creates furniture that withstands decades of use while developing rich patina. Walnut’s chocolate tones and straight grain make it forgiving for beginners, while oak’s pronounced medullary rays add visual drama but demand sharp tools and careful planing to avoid tearout.
Softwoods like pine, cedar, and Douglas fir grow faster and cost less, but “soft” doesn’t mean weak. Old-growth pine built furniture that has survived centuries. These species work easily with hand tools and accept stains readily, though their open grain requires sealing before topcoats.
Grain pattern dictates both strength and beauty. Quarter-sawn timber, where growth rings run perpendicular to the face, resists warping and showcases striking ray figure in species like oak. Plain-sawn boards, more common and economical, display cathedral patterns but move more with humidity changes.
In Liam’s workshop, a recent dining table paired quarter-sawn white oak legs for stability with rift-sawn tops that balanced visual interest against movement concerns. The student learned that reading grain direction before cutting prevents splits and ensures joints align with the wood’s natural structure rather than fighting it.
Engineered Wood Products and Their Place
Engineered wood products earn their place in quality furniture when you understand their specific strengths. Plywood excels in applications requiring dimensional stability, cabinet backs, drawer bottoms, and curved components bend without splitting along grain lines. Its cross-laminated structure resists seasonal movement that would warp solid timber, making it invaluable for large panels.
MDF provides a perfectly flat, uniform substrate for veneering and painted finishes. The dense, void-free surface takes edge profiles cleanly and holds hardware reliably. I often specify it for painted built-ins where grain texture isn’t desired, though its weight and dust production during machining require consideration.
Particle board serves well in secondary applications where cost matters more than aesthetics, internal cabinet dividers or underlayment beneath veneer. Its lower structural strength limits use in load-bearing components.
The real craft lies in hybrid construction: combining engineered products where their properties shine with solid timber where strength and beauty matter most. This approach lets you build stable, cost-effective furniture without compromising the elements that define quality. Edge-band plywood panels with solid timber, use MDF cores with hardwood frames, and reserve your finest materials for visible surfaces.
Metals, Glass, and Composite Materials
Steel, aluminum, and brass bring structural integrity and modern aesthetics to furniture designs. Steel tubing creates robust table bases and chair frames, while brass hardware adds refined detail to drawers and doors. Aluminum extrusions work well for lightweight contemporary pieces, though they require specialized fastening techniques.
Tempered glass serves as dramatic table surfaces or cabinet doors, demanding careful edge finishing and proper support systems. It distributes loads differently than wood, always support glass uniformly across its edges rather than at discrete points.
Composite materials like resin-bonded panels or carbon fiber components appear in specialized applications. These require different adhesives and fasteners than traditional materials. In my workshop, we integrate metal brackets and glass panels where they genuinely enhance function, not merely for fashion. Each material demands respect for its unique properties and proper joinery methods.
Tools and Preparation You’ll Need
Working with furniture construction materials demands proper tools and a methodical approach to preparation, even the finest timber becomes frustrating without the right equipment. Whether you’re pursuing beginner woodworking or advancing your skills, assembling the correct toolkit makes every material easier to handle and more forgiving during construction.
Your essential workshop setup divides into five categories, each addressing a specific stage of material work:
- Measuring and marking tools: tape measure, combination square, marking gauge, pencil, and marking knife
- Cutting tools: handsaw or circular saw, table saw for dimensioning, jigsaw for curves, and sharp chisels
- Joinery tools: drill with bits, router with basic cutters, clamps in various sizes, and smoothing plane
- Finishing tools: orbital sander with assorted grits, scrapers, and quality brushes or rags for finish application
- Safety equipment: dust mask or respirator, safety glasses, hearing protection, and push sticks for machine work
Beyond tools, material preparation starts before any cutting begins. Bring timber into your workshop space at least two weeks before machining, allowing it to stabilize at the ambient humidity. Stack boards with thin spacers between each layer, creating airflow channels that prevent moisture trapping. This acclimatization period prevents boards from warping or twisting after you’ve invested hours in precise joinery.
Initial dimensioning, your first machining step, requires checking moisture content with a meter (aim for 8-12% for indoor furniture) and examining each board for defects. Cut rough lengths slightly oversize, giving yourself room to work around knots, splits, or discolored sections. In Liam’s workshops, students learn that this methodical preparation, though seemingly slow, actually saves time by preventing mid-project material failures. The right tools combined with patient preparation create the foundation for confident, successful furniture making.
Safety Considerations When Working with Furniture Materials
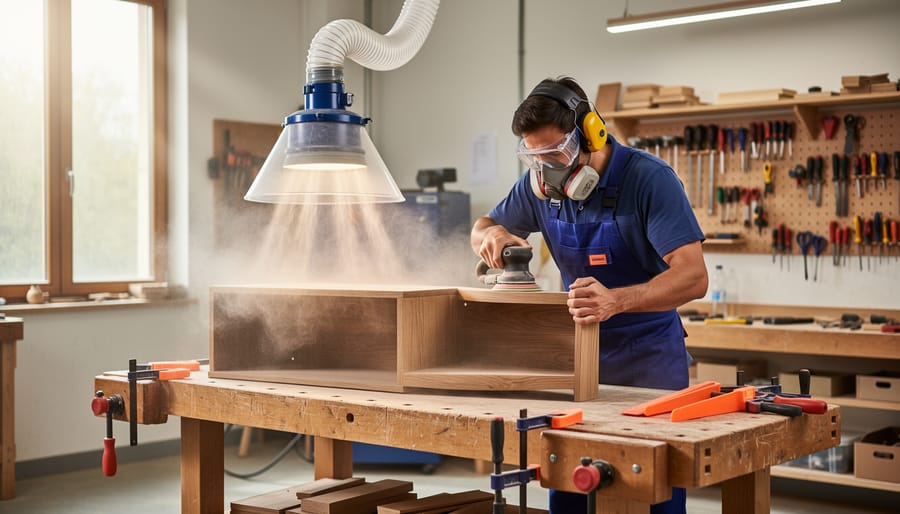
Working with furniture materials exposes you to hazards that aren’t always obvious until you’ve already created a problem. The fine dust from machining timber, particularly hardwoods, represents one of the most serious long-term risks in any workshop. Your lungs have no mechanism for clearing particles smaller than 10 microns, and prolonged exposure leads to respiratory conditions that can end your woodworking journey permanently. Every powered tool, table saws, routers, sanders, planers, needs effective dust extraction connected directly at the source, not just a shop vacuum running nearby.
Respiratory protection matters even with extraction systems running. A properly fitted P2 or P3 respirator filters what your extraction misses, especially during sanding operations that create the finest, most dangerous particles. Don’t rely on those flimsy dust masks from the hardware store; they’re nearly useless against fine wood dust.
MDF and particle board present different challenges. These engineered products release formaldehyde during cutting and generate dust so fine it becomes airborne instantly. The dust from these materials is also highly abrasive, wearing down cutting edges faster while creating greater health hazards. Increased ventilation and stricter respiratory protection become non-negotiable when working with composites.
Finishing chemicals demand equal respect. Solvent-based stains, lacquers, and oils release volatile organic compounds that affect your nervous system with repeated exposure. Work in well-ventilated areas, store chemicals in sealed containers away from heat sources, and wear nitrile gloves when handling any finish. The romantic image of the craftsperson applying oil with bare hands ignores the reality that many finishing products penetrate skin readily, carrying toxins directly into your bloodstream.
Step-by-Step: Selecting and Preparing Your Material
Step 1: Assess Your Project Requirements
Before you cut a single piece of timber or pull out your wallet at the supplier, you need a clear picture of what you’re building and how it will be used. Start by asking yourself four questions that will steer every material decision that follows.
First, consider the structural demands. Will this piece support significant weight, like a dining table bearing serving dishes and elbows, or is it primarily decorative? A bookshelf holding leather-bound volumes needs far more rigidity than a hallway console table. Think about joint types too: mortise-and-tenon frames require different material properties than edge-glued panels.
Second, examine the intended use and environment. A kitchen island faces moisture, heat, and daily wear that a bedroom dresser never encounters. Outdoor furniture demands materials that can handle UV exposure and humidity swings. In Liam’s workshops, students learn that a coffee table in a family home with young children needs different material resilience than one destined for an adult’s study.
Third, define your aesthetic vision. Do you want dramatic grain patterns or subtle uniformity? A contemporary clean-lined piece might call for straight-grained maple, while a rustic farmhouse table celebrates the character marks in reclaimed oak.
Finally, be honest about your skill level. If you’re just starting out, choose your first materials from forgiving species like pine or poplar rather than temperamental exotics. These four considerations work together to create a shortlist of suitable materials before you invest time or money.
Step 2: Evaluate Material Properties
Once you’ve clarified your project requirements, it’s time to examine the timber itself. Run your hand across the surface, does the grain feel tight and consistent, or wild and unpredictable? Liam teaches his students to assess five critical properties before committing to a material.
Hardness determines workability and durability. Press your thumbnail into an edge: hardwoods like oak resist the pressure, while softer species like pine yield slightly. This simple test reveals how the material will respond to tools and wear.
Grain direction shows how the wood grew. Hold the board at eye level and follow the lines. Straight grain machines cleanly and remains stable; interlocked or wavy grain adds visual drama but tears during planing and moves more with humidity changes.
Stability relates to the wood’s tendency to expand and contract. Quarter-sawn boards, where growth rings meet the face at 60-90 degrees, move less than flat-sawn lumber.
Examine color variation across the board, sapwood versus heartwood, mineral streaks, figuring. Finally, assess texture: open-pored woods like ash need grain filling for smooth finishes, while maple’s tight grain polishes directly.
Liam calls this “listening to the timber tell you what it wants to become.”
Step 3: Source and Inspect Your Materials
Finding quality materials requires knowing where to look and what to inspect before purchase. Specialist timber merchants offer better selection and expertise than big-box stores, staff can advise on species characteristics and help you choose boards with favorable grain. Salvage yards and reclamation specialists provide unique character timber, though require more careful inspection.
When selecting boards, check for splits, knots, cupping, and twist by sighting along the length. Reject pieces with checks extending deep into the timber or large dead knots that will fall out. Use a moisture meter to verify 8-12% moisture content for indoor furniture, wet timber will shrink and crack after construction.
Examine grain alignment relative to your project needs. Straight grain machines cleanly and remains stable. Figured grain adds visual interest but can tear during planing. For tabletops and panels, select boards with similar color and grain patterns.
Calculate quantities by adding 20-30% waste allowance for defect removal, grain matching, and mistakes. Liam teaches students to buy one extra board beyond calculations, the peace of mind outweighs the modest additional cost, and leftover timber finds use in smaller projects or test pieces.
Step 4: Condition and Acclimatize
Once your materials arrive at your workshop, resist the temptation to start cutting immediately. Wood needs to adjust to your workspace’s humidity and temperature, a process Liam calls “letting the timber settle in.” Stack boards horizontally with thin stickers (spacers) between each piece, allowing air to circulate around all surfaces. Space these stickers every 18-24 inches along the length, aligning them vertically to prevent sagging.
The conditioning period depends on material thickness and how drastically conditions differ from the timber yard. As a rule, allow one week per inch of thickness. A moisture meter becomes invaluable here, you’re aiming for equilibrium moisture content that matches your workshop environment, typically 8-12% for indoor furniture in most climates.
Store materials away from direct heat sources and drafts. Liam teaches students to check for readiness by testing a sample piece: machine it to final thickness, then let it sit overnight. If it remains flat and stable, your stock is ready for construction.
Step 5: Initial Preparation and Dimensioning
Once your material has acclimatized, the machining sequence matters as much as the techniques themselves. Start by rough-cutting pieces 25-50mm over final length, this extra material lets you work around end checks and gives you room to square things up later. At Liam’s workshop, students learn to mark the best face first, identifying the grain direction that’ll plane smoothly.
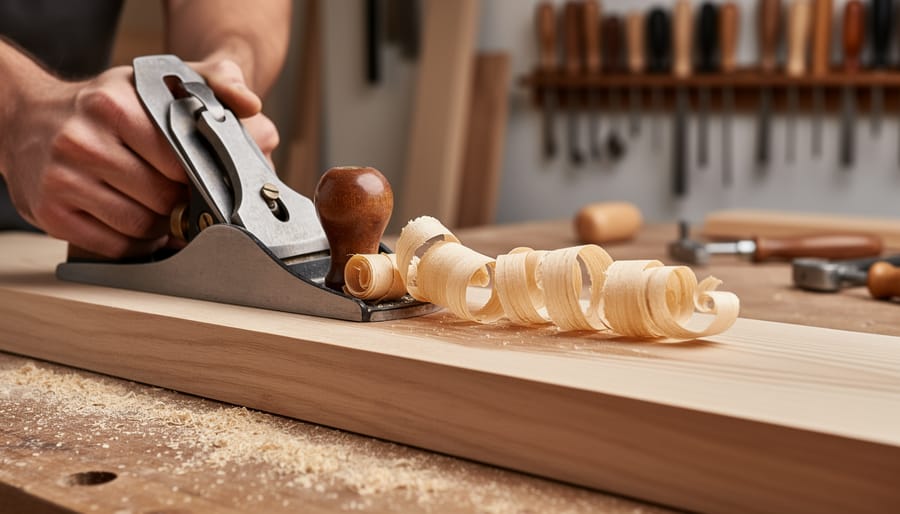
Face planing establishes your reference surface. Feed timber with the grain rising toward the outfeed table to prevent tearout. One flat face leads to edge jointing, where you create a 90-degree reference edge against that face. Check squareness frequently, your first two surfaces define everything that follows.
Thicknessing comes last, working down to final dimension in 1-2mm passes. Leave yourself 0.5mm over target for final hand planing or sanding. As you dimension, actively look for defects you can cut away. That knot near one end? Trim it off now rather than discovering it ruins a critical joint later.
The goal isn’t just flat boards, it’s preparing material that’ll behave predictably as you build.
Working Properties: How Materials Behave During Construction
Understanding how materials behave under your tools transforms furniture making from frustrating guesswork into confident craftsmanship. Each material has distinct working properties that determine how easily it cuts, how cleanly it shapes, and how forgiving it is when mistakes happen.
Solid hardwoods like oak and ash machine beautifully with sharp tools, producing clean cuts and crisp joinery. Their density means they hold details well, dovetails stay sharp, mortises remain true. But this same hardness demands respect: dull blades burn the wood, and forcing cuts can cause tearout. Cherry and walnut sit at the opposite end of the hardwood spectrum. They cut like butter, accepting hand planes and chisels with minimal resistance, which makes them excellent choices for hand-tool work and forgiving for students learning joinery techniques.
Softwoods present different challenges. Pine machines quickly but dents easily during handling and construction. Its varying density within growth rings can cause tools to dig in unexpectedly. One of Liam’s students, Sarah, learned this while building her first bedside table. After struggling with tearout on pine, she switched to poplar for her next project and found it machined more predictably despite being technically a hardwood.
Engineered products behave entirely differently. Plywood cuts cleanly but the cross-grain veneers can chip at edges, requiring backing boards during cutting and careful feed rates. MDF machines to glass-smooth surfaces and accepts paint beautifully, but its dust is particularly problematic and its weight surprises newcomers. It also dulls cutting edges faster than solid wood.
Grain direction matters enormously. Cutting with the grain feels effortless; against it, you fight the entire way. Quarter-sawn timber remains more stable and machines more predictably than flat-sawn boards, though both come from the same species. Learning to read grain direction before making cuts, looking at end grain, observing surface patterns, prevents most tearout problems.
The finish reveals everything. Some woods like maple show every surface imperfection under clear finish, demanding meticulous sanding. Others like oak are more forgiving, their open grain hiding minor surface flaws. Liam often has students practice on scraps with their chosen finish before touching the actual project pieces, a step that has saved countless hours of remedial sanding.
Verification: Testing Your Material Choice
Before committing to your chosen material for a full project, run verification tests to confirm it will perform as expected. These simple checks can save hours of frustration and wasted effort on unsuitable timber or sheet goods.
Start with test cuts on scrap pieces from your selected material. Machine a small section through your table saw or router to assess how cleanly it cuts, excessive tearout, burning, or chipping signals potential problems. Test a sample joint using your planned construction method, whether that’s mortise-and-tenon, dovetails, or other joinery basics. The joint should fit snugly without forcing and hold together with appropriate strength for the furniture’s intended use.
Apply your planned finish to a test piece rather than discovering incompatibility on your completed work. Some timbers absorb stain unevenly or react poorly with certain oils and varnishes. Let the sample dry completely and evaluate the color, grain enhancement, and surface texture.
Your verification checklist should confirm these essentials:
- Material machines cleanly without excessive tearout or burning
- Test joints fit properly with appropriate tolerance and strength
- Finish applies evenly and produces the desired appearance
- Material demonstrates adequate strength for structural requirements
- No significant movement occurs after proper acclimatization period
Warning signs that warrant reconsidering your material choice include persistent tearout regardless of cutting direction, joints that won’t hold without excessive clamping pressure, finish that blotches or won’t penetrate, or noticeable warping after the acclimatization period. Finding these issues during verification gives you the option to select alternative material before you’ve invested significant time in construction.
Common Challenges and How to Overcome Them
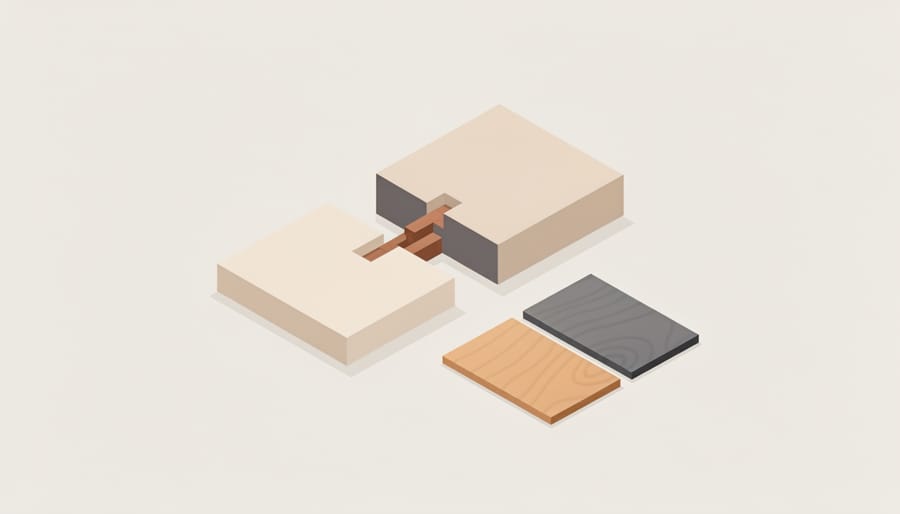
Material challenges are inevitable in furniture making, but recognizing them early and knowing how to respond separates successful projects from abandoned ones. Through years of teaching, Liam has observed that most material problems fall into predictable patterns with straightforward solutions once you understand what’s happening.
Unexpected wood movement after machining is perhaps the most common frustration. Timber that seemed stable suddenly cups or twists within hours of being dimensioned. This typically signals the material wasn’t fully acclimatized to your workshop environment. The immediate fix involves re-machining the affected pieces, but prevention is simpler: bring timber into your workshop at least two weeks before working it, and stack it with stickers between boards to allow air circulation on all faces. If movement occurs mid-project, work quickly through joinery and assembly stages to lock the wood into its structural framework before further changes happen.
Difficult grain tears out during planing or creates rough surfaces that resist finishing. Rather than fighting it, adjust your approach. Reduce your planing depth to finer cuts, skew your hand plane to slice rather than chop the fibers, or switch to scraping and sanding for figured woods like bird’s-eye maple or wild-grained ash. Liam teaches students to view challenging grain as an opportunity to develop tool control rather than a defect in the material.
What should I do if I discover a hidden defect after cutting my material?
Reassess whether the defect affects structural integrity or just appearance. Small knots and checks can often be incorporated into less visible areas, while splits near joints require cutting new pieces from your waste allowance.
How do I adapt when my preferred timber species isn’t available?
Focus on matching the key properties your project requires rather than the specific species. If you needed oak for its hardness, ash or beech might substitute; if color was the priority, consider staining an alternative hardwood.
Can I mix different wood species in one furniture piece?
Yes, but choose species with similar movement characteristics and densities to avoid differential expansion problems. Contrasting woods work beautifully as visual accents when their structural properties are compatible.
Material shortages mid-project require creative thinking. Keep your cutoff pieces organized by size and quality. That walnut offcut from your last table might provide the perfect drawer pull for your current cabinet. When substitution becomes necessary, match the working properties and visual weight rather than insisting on identical species. A furniture maker’s ability to adapt gracefully to material challenges grows with each piece you build your next piece transforming potential setbacks into opportunities for creative problem-solving.
Next Steps: Building Your Material Knowledge
Building genuine material expertise happens through deliberate, ongoing practice rather than memorization. Each piece you create teaches you something new about how timber moves, how different species respond to tools, and which characteristics matter most for specific applications.
Start by working with a variety of species across different projects. If you’ve been using only oak, try ash or cherry. Notice how each timber cuts, finishes, and ages. Keep offcuts from every project and date them, these become invaluable references showing how materials change color and texture over time. Many experienced makers maintain a labeled collection of samples that they can touch and examine when planning new work.
Practical courses offer compressed learning that would otherwise take years to acquire alone. Liam’s furniture making courses combine material theory with hands-on selection and preparation, giving students direct experience reading grain, assessing quality, and matching timber to project requirements. Working alongside an experienced maker reveals subtleties that written guides simply can’t convey.
Visit timber yards regularly, even when you’re not buying. Handle boards, ask questions, and observe how professionals assess stock. Most suppliers welcome craftspeople who show genuine interest in understanding their materials.
Document your own projects with notes on which materials you used, how they performed during construction, and how they’ve held up over time. Photograph problem areas alongside successful sections. This personal reference library becomes more valuable than any textbook because it reflects your actual working conditions and methods.
Every furniture piece you complete adds layers to your material understanding. The wood that seemed challenging on your first project becomes familiar. The species you avoided begins to make sense. Trust that your knowledge compounds with each shaving that falls from your plane.
Mastering furniture construction materials isn’t something you learn overnight. It’s a gradual journey where scientific understanding meets hands-on intuition, and each project adds to your material literacy.
Throughout my years teaching at Liam O’Connor Furniture, I’ve watched countless students transform from cautious beginners into confident craftspeople who can assess a timber board and immediately know whether it suits their project. That confidence doesn’t come from memorizing charts or following rigid rules. It develops through touching different woods, making test cuts, experiencing how materials respond under your tools, and yes, occasionally choosing wrong and learning why.
Start where you are. If you’re building your first table, select forgiving hardwoods like oak or ash rather than temperamental exotics. Master joinery techniques with stable materials before tackling highly figured timbers that demand advanced skills.
Every piece you build expands your material vocabulary. You’ll begin recognizing grain patterns that signal strength or instability, understanding which species machine cleanly versus those requiring patience, and developing preferences based on real workshop experience rather than theory alone.
The materials are waiting. Your expertise will follow, one project at a time.
Leave a Reply