How to Create Your First Piece of Furniture: A Student’s Complete Woodworking Guide
Creating your first piece of furniture through woodworking is a structured process that typically takes 10 to 20 hours spread across several days, requiring just six essential tools and a methodical approach that prioritizes safety and precision. Students beginning their furniture-making journey often start with a simple bench or side table, projects that teach fundamental joinery techniques while delivering a functional, handcrafted piece worthy of any home.
The transformation from raw lumber to finished furniture happens through a sequence of measuring, cutting, joining, and finishing operations that have remained largely unchanged for centuries. What has changed is accessibility. You don’t need a fully equipped workshop or years of apprenticeship to begin. With careful planning, a modest selection of quality tools, and attention to proven techniques, first-time furniture makers consistently produce pieces that surprise them with their beauty and durability.
Sarah Chen, one of our students who completed her first bench in spring 2025, arrived with zero woodworking experience and left with a walnut and maple piece now displayed in her living room. Her success wasn’t exceptional talent but rather following the complete process: understanding material selection, mastering safe tool operation, executing joints with patience, and applying finishes that protect and enhance the wood’s natural character.
This guide walks you through that same proven framework, breaking down each phase from choosing your wood species to final quality inspection. You’ll learn which tools justify the investment, how to set up a safe workspace in limited square footage, and the specific joinery methods that create furniture built to last generations.
Understanding Your First Project: Choosing What to Build
Your first furniture project sets the foundation for everything that follows in your woodworking journey. Choose wisely, and you’ll build confidence alongside your piece; choose poorly, and you might find yourself frustrated before you’ve truly begun.
The ideal first project balances ambition with realism. You want something that challenges you enough to develop genuine skills but doesn’t overwhelm with complexity that could derail your enthusiasm. Think about pieces that serve a real purpose in your life, furniture you’ll actually use creates stronger motivation to see the project through to completion.
Consider these characteristics when selecting your first build:
- Small to medium size that fits comfortably in a home workshop or student workspace
- Simple joinery techniques like pocket screws, dowels, or basic mortise and tenon joints
- Practical function that justifies the time investment and creates immediate value
- Opportunities to learn fundamental skills including measuring, cutting, and finishing
A side table makes an excellent starting point for most students. It requires only four legs, a top, and perhaps a lower shelf, manageable components that introduce you to working with square construction and basic joinery without demanding complex curves or angles. You’ll learn to mill timber to dimension, create stable joints, and achieve a flat, smooth surface.
Simple benches offer similar advantages with added structural learning. A three-foot garden bench or entryway seat teaches weight-bearing principles and the importance of robust joinery, yet remains forgiving enough for beginners. The rectangular form keeps cuts straightforward, and any minor imperfections won’t compromise the piece’s character.
Shelving units provide perhaps the most forgiving introduction to furniture making. A basic bookshelf with adjustable shelves or a wall-mounted display case allows you to focus on accurate measurements and clean joinery without the pressure of creating perfectly matched legs or complex angles. The modular nature means you can approach it in stages, completing one section before moving to the next.
Avoid ornate chairs, dining tables with extensions, or anything requiring compound angles for your debut project. Save cabinets with doors and drawers for after you’ve mastered basic carcass construction. Your first piece should build skills, not test patience you haven’t yet developed.
Essential Tools and Materials for Student Furniture Makers
Hand Tools Every Student Should Have
Starting with hand tools builds fundamental skills that power tools can’t teach. Your hands learn to read grain, feel resistance, and develop the muscle memory that separates competent work from exceptional craftsmanship.
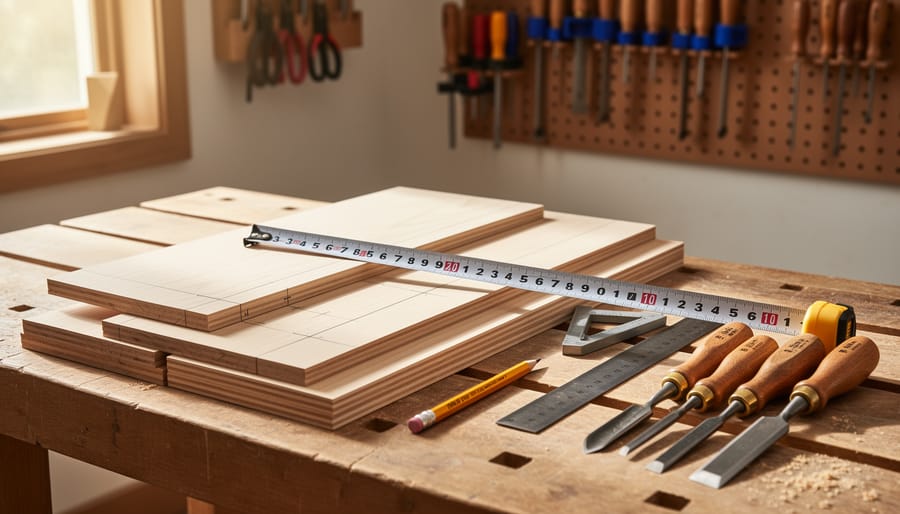
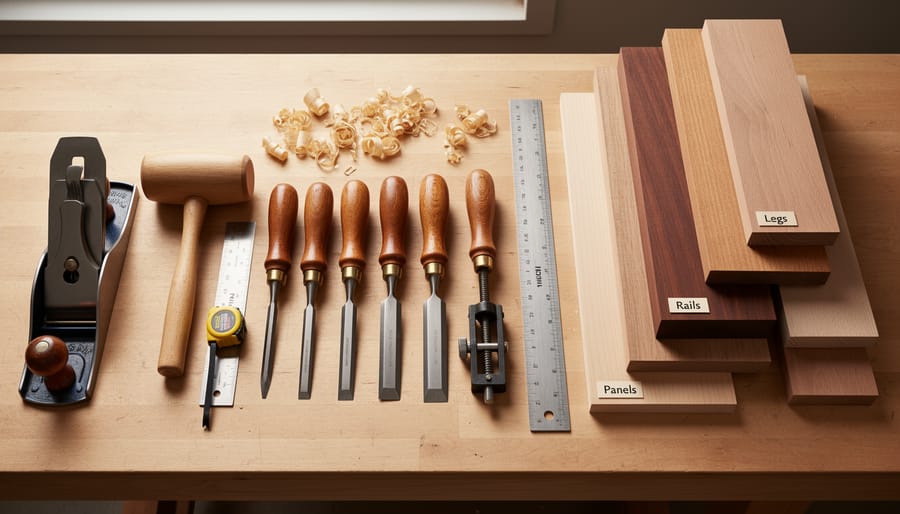
A basic kit begins with measuring and marking: a combination square for checking right angles and marking parallel lines, a tape measure, and sharp pencils or marking knives. Accurate marking prevents costly timber waste and ensures joints fit properly.
For cutting, invest in a quality handsaw, either a crosscut or Japanese pull saw, rather than buying cheap versions that fight you at every stroke. A coping saw handles curves and waste removal between dovetails.
Your chisel set needs just four sizes to start: 6mm, 12mm, 19mm, and 25mm. Buy the best you can afford and learn to sharpen them immediately. Dull chisels are dangerous and frustrating.
A block plane smooths end grain and refines joints, while a jack plane flattens surfaces and removes material quickly. These two planes handle most student project needs without requiring a full bench plane collection.
Finally, add a mallet for chisel work, clamps in various sizes, and a sharpening system. Sharp tools make woodworking enjoyable rather than exhausting.
Power Tools: What to Invest in First
A circular saw or track saw should be your first power tool purchase, it transforms cutting large panels and breaking down timber from a laborious chore into a quick, accurate task. Students with workshop access can defer this, as most training spaces provide table saws, but ownership gives you freedom to work at home.
Next, invest in a random orbital sander. Hand-sanding furniture is physically exhausting and time-consuming. A quality sander delivers consistent results across large surfaces in a fraction of the time, and you’ll use it on every single project.
A cordless drill-driver is essential for pilot holes, hardware installation, and assembly work. Choose a reputable brand with interchangeable batteries, you’ll likely expand your cordless tool collection over time.
Consider waiting on larger machines like planers, jointers, or table saws until you’ve completed several projects. These represent significant investment and require dedicated space. Many students find shared workshop access or timber suppliers’ milling services more practical initially. Buy tools as specific projects demand them rather than stockpiling equipment you might rarely use.
Selecting Your Timber and Materials
Choosing the right timber transforms your furniture from a learning exercise into something you’ll treasure for years. Start with hardwoods like oak, ash, or cherry, they’re forgiving to work with and age beautifully, though they cost more than softwoods. Pine and poplar offer budget-friendly alternatives that still deliver satisfying results for first projects.
Examine each board closely before buying. Look for straight grain running parallel to the board’s length, as wild or interlocking grain tears out easily under hand planes and chisels. Avoid boards with large knots near where you’ll cut joinery, knots are hard, unpredictable, and weaken structural connections.
Moisture content matters enormously. Kiln-dried timber at 8-10% moisture content remains stable indoors and won’t warp after you’ve assembled your piece. Many timber merchants will check moisture levels with a meter if you ask.
Buy 20% more material than your cutting list specifies. This buffer accounts for defects you’ll discover during milling and the occasional miscut that every student makes. Local sawmills often sell offcuts and shorts at significant discounts, perfect for student budgets without compromising quality.
Workshop Safety: Protecting Yourself While You Learn
Before you pick up your first chisel or switch on a saw, understand this: safety isn’t just a checklist you tick off, it’s the foundation upon which all good woodworking practice is built. Every accomplished furniture maker has embedded safety into their muscle memory, and as a student, developing these habits from day one will serve you throughout your entire woodworking journey.
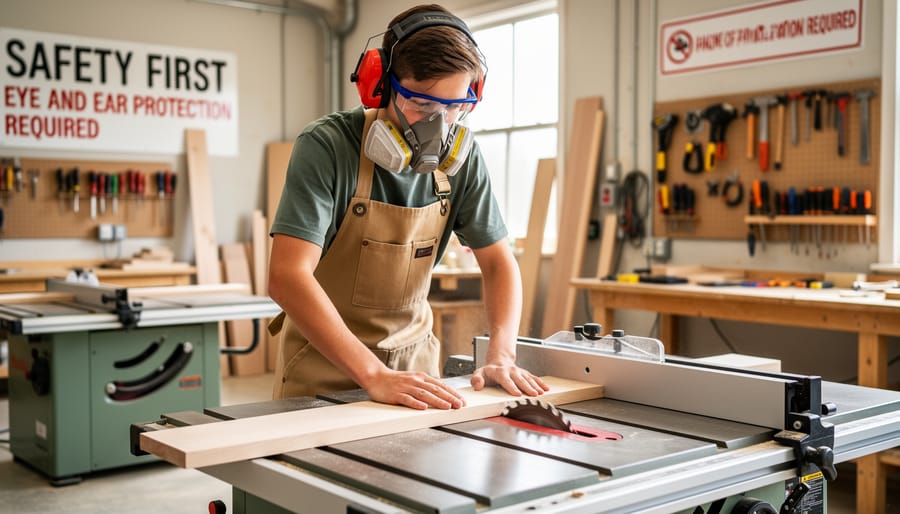
Start with essential PPE for woodworking: safety glasses or goggles to protect against flying chips and dust, hearing protection when operating power tools, and a properly fitted dust mask or respirator for sanding and machining operations. These aren’t optional extras. Wood dust is a respiratory irritant and potential carcinogen, while a single wood chip striking your eye can end your woodworking career permanently.
Your workshop environment matters as much as your personal protection. Keep floors clear of offcuts and debris that could cause trips or slips, ensure adequate lighting so you can see cut lines and blade positions clearly, and maintain proper ventilation to manage dust and fumes. Before starting any cut, take three seconds to check your body position: stand to the side of the blade path, never reach over running machinery, and keep both hands engaged with the workpiece or tool handles.
Develop the habit of inspecting tools before use. Dull blades require more force and are more likely to slip or kick back. Loose handles, frayed cords, and damaged guards all signal stop. Your concentration matters too, rushing, fatigue, and distractions lead to mistakes. If you feel tired or unfocused, step away. The wood will still be there tomorrow, but fingers don’t grow back.
The Furniture Making Process: From Design to Completion
Step 1: Creating Your Design and Cutting List
Every successful furniture project begins on paper, not at the workbench. Before cutting a single piece of timber, create a simple sketch showing your piece from multiple angles, front, side, and top views work well. These don’t need artistic skill; clear lines with dimensions marked are sufficient. Measure twice, and add those measurements directly to your drawing.
From your sketch, develop a cutting list: a detailed inventory of every component with its finished dimensions (length, width, thickness) and quantity needed. List the longest pieces first, this helps when selecting boards. Include notes about grain direction for visible surfaces. A typical side table might list: “2 legs, 700mm × 45mm × 45mm” and “1 top, 500mm × 400mm × 20mm.”
Calculate your material requirements by adding waste allowance. For rough-sawn timber, add 25mm to length for end defects and 3-6mm to thickness for milling. This planning prevents mid-project material shortages and reduces expensive waste. Students who skip this step invariably end up making unnecessary trips to the timber merchant or compromising their design when they run short.
Step 2: Milling and Preparing Your Timber
Milling timber is where raw lumber transforms into precise furniture components. This process establishes the foundation for accurate joinery, so take your time here, rushing through preparation will haunt you during assembly.
Start with rough-sawn timber that’s typically oversize and uneven. Your goal is creating four flat, square surfaces on each board. Begin by identifying your best face, the side with the most appealing grain and fewest defects. Flatten this surface using a hand plane or jointer, checking with a straightedge until no light passes underneath. This becomes your reference face, the datum point for all subsequent operations.
Next, prepare an adjacent edge square to that face, creating your reference edge. Use a marking gauge to scribe your final thickness from the reference face, then plane the opposite face parallel to it. Finally, rip the board to width, keeping your reference edge against the fence.
This sequence, face, edge, thickness, width, ensures every component has consistent dimensions and square corners. Student furniture makers often underestimate how critical this step is. Properly prepared timber means joints fit snugly and assemblies stay square, while poorly milled components create frustration at every subsequent stage.
Step 3: Marking and Cutting Joinery
Joinery transforms separate pieces of timber into a cohesive, structurally sound piece of furniture. For your first project, choose a joint appropriate to your skill level and available tools. Dowel joints offer simplicity, drill accurately aligned holes, apply glue, and insert hardwood dowels to create strong connections between components. Pocket hole joinery, using a specialized jig, allows rapid assembly with screws driven at an angle, ideal for face frames and internal structures where the holes won’t show.
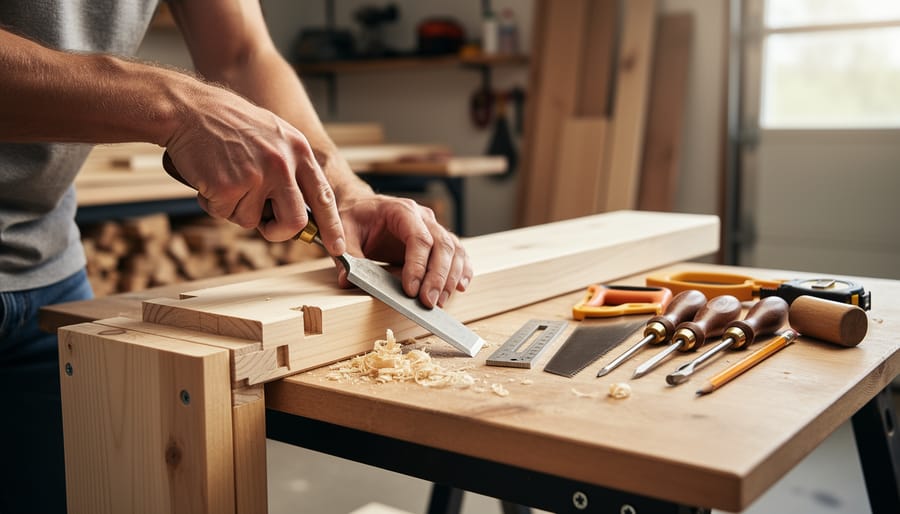
If you’re ready for a traditional challenge, the mortise and tenon joint teaches fundamental skills that underpin all fine furniture making. Mark the mortise location carefully with a marking gauge, working from your reference face. Cut the mortise using a chisel and mallet, removing waste in stages to maintain clean walls. The tenon, cut on the rail end, must fit the mortise precisely, aim for a snug push fit that requires gentle persuasion rather than force.
Accuracy matters more than speed. Check each marking twice before cutting, and test-fit frequently. A poorly cut joint compromises both strength and appearance, while patience in this step pays dividends during assembly.
Step 4: Dry Assembly and Fitting
Dry assembly is your chance to catch problems before glue makes them permanent. Fit all joints together without adhesive, checking that everything aligns properly and sits flush. This rehearsal reveals tight spots that need easing, gaps requiring adjustment, or components cut slightly off-square. Use clamps to hold the assembly together exactly as you will during the final glue-up, then step back and assess from multiple angles. Check diagonal measurements to confirm the piece is square, they should match within a millimetre or two. Mark where each clamp will go and which components join in what sequence. Students who skip this step inevitably face scrambling during glue-up when working time is limited and mistakes costly.
Step 5: Gluing and Clamping
The glue-up transforms your carefully fitted components into a permanent structure, and there’s no undoing it once the adhesive sets. Before opening any glue bottle, lay out every clamp you’ll need and position them within arm’s reach, a panicked search for the right size clamp wastes precious working time.
Apply PVA wood glue sparingly to joinery surfaces; a thin, even layer bonds better than excess that simply squeezes out. Work methodically through your assembly sequence, checking diagonal measurements to verify the frame sits square before the glue begins to grab. Position clamps to distribute pressure evenly across joints without bowing components, and use softwood blocks to prevent clamp marks on your finished surfaces. Most woodworking adhesives allow fifteen to twenty minutes of open time, but temperature and timber moisture affect this, move deliberately, not frantically.
Step 6: Final Shaping and Surface Preparation
After glue-up comes the transformative work of refining your piece. Start by scraping or carefully planing away any dried squeeze-out around joints, this prevents finish problems later. Use a sharp hand plane or card scraper to flatten surfaces and remove machine marks, working with the grain direction. Progress through sandpaper grits systematically: 80 or 100 to remove plane marks, then 120, 180, and finally 220 for furniture-grade smoothness. Sand with the grain in long, even strokes, checking your progress by feel and oblique lighting that reveals scratches. This patient surface preparation determines how your finish will look, so don’t rush it.
Finishing Your Work: Protection and Presentation
Your furniture’s surface finish serves two vital purposes: protecting the wood from moisture, dirt and wear while bringing out its natural beauty. As a student woodworker, choosing and applying the right finish can transform a competently built piece into something that looks genuinely professional.
Start by understanding your options. Oil finishes like Danish oil or tung oil penetrate the wood fibres, offering natural protection and easy application, simply wipe on with a cloth, let it soak in for fifteen minutes, then wipe off the excess. They’re forgiving of mistakes and perfect for first projects, though they provide moderate protection. Wax finishes add a soft lustre and pleasant feel but offer minimal moisture resistance, making them better as a topcoat over oil rather than a standalone finish.
For greater durability, consider varnishes or polyurethanes. Water-based versions clean up easily and dry quickly with minimal odour, while oil-based varieties provide richer colour and superior protection. Apply thin coats with a quality brush using long, smooth strokes in the direction of the grain. Three thin coats always beats one thick one, thick applications drip, sag and take forever to cure properly.
Surface preparation determines your finish quality more than the product itself. After final sanding, vacuum the piece thoroughly and wipe it down with a slightly damp cloth to remove every speck of dust. Let it dry completely before applying finish.
Test your chosen finish on scrap wood from your project first. This reveals how it affects the colour and lets you practise application technique without risking your hours of work. Some woods darken dramatically with certain finishes, better to discover this on a test piece than on your completed table.
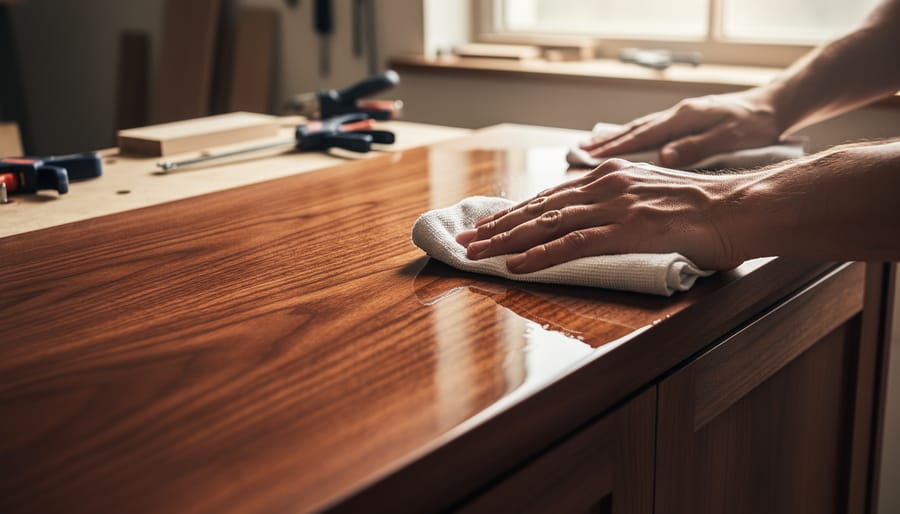
Verification and Quality Assessment: Evaluating Your Finished Piece
Once you set down your tools and step back from your completed piece, the real learning begins. Evaluating your finished furniture isn’t about harsh self-criticism, it’s about developing the trained eye that separates hobbyists from craftspeople. This assessment process teaches you to see what worked, what didn’t, and most importantly, why.
Start with a systematic walk-around inspection. Examine your piece from all angles, at different heights, and in varied lighting conditions. Natural daylight reveals details that workshop fluorescents often hide. Run your hands over surfaces, your fingertips will detect inconsistencies your eyes might miss. Check these essential quality markers:
- Structural soundness: Apply gentle pressure to test for wobble or flex where there shouldn’t be any
- Joint tightness: Look for gaps in mortise and tenons, miters, or edge joints
- Surface finish consistency: Check for missed spots, drips, brush marks, or uneven sheen
- Dimensional accuracy: Verify that legs are equal length, surfaces are level, and the piece sits flat
- Aesthetic balance: Assess whether proportions, grain patterns, and visual weight feel harmonious
Place a straightedge across flat surfaces to reveal any bowing or twisting. Open and close any drawers or doors repeatedly, they should move smoothly without binding or rattling. For chairs or benches, sit on them. For tables, apply downward pressure at the corners. Your furniture needs to function, not just look beautiful.
Document what you discover. Take photographs from multiple angles, and keep written notes about specific joints that fit perfectly or areas where tearout occurred. This record becomes invaluable when planning your next project. Ask yourself honest questions: Where did my measuring falter? Which joinery technique needs more practice? Did I rush the sanding?
Learning from Student Success Stories
When Emma enrolled in her first woodworking course, she’d never held a hand plane. Six weeks later, she walked out with a cherry side table that now sits in her living room, complete with through-tenon joinery she’d carefully cut by hand. Her journey wasn’t without setbacks. She split two table legs learning to cut mortises and had to remake them, which taught her more about grain direction than any textbook explanation could. That frustration turned into understanding, and by the final week, she was helping newer students avoid the same mistake.
James chose to build a simple hall bench for his first project, drawn to its practicality. His instructor noticed he struggled with confidence using chisels, so they spent extra time on paring techniques before moving to joinery. The breakthrough came when James understood that sharp tools require less force, suddenly his cuts became controlled and precise. His finished bench features lap joints he’s genuinely proud of, and he recently sent photos of it holding coats and shoes in his entryway.
What strikes you when watching students work through these projects isn’t perfection, it’s transformation. Sarah’s bookshelf has slight gaps in one dovetail joint that she chose to leave rather than remake the piece. She calls it her “learning line” and says it reminds her how far she’s come. These aren’t showroom pieces, but they’re solid, functional furniture that students built with their own hands under expert guidance.
The structured environment matters enormously. Having someone correct your sawing angle before you’ve cut through the workpiece, or showing you exactly where your marking gauge reference should sit, these moments prevent compounding errors that discourage self-taught beginners.
Common Challenges and How to Overcome Them
Every student furniture maker confronts similar hurdles, and recognizing these challenges early helps you navigate them with less frustration. Measurement errors rank among the most common setbacks, often stemming from confusion between reference faces or misreading tape measures under time pressure. The solution lies in slowing down and double-checking every measurement before cutting. Adopt the carpenter’s mantra “measure twice, cut once,” and mark your reference edges clearly on each board. When you do make a cutting error, assess whether the piece can be repurposed elsewhere in your project before discarding it entirely.
Wood tearout, particularly when planing or routing across the grain, troubles beginners who haven’t yet learned to read timber direction. You can minimize tearout by taking lighter passes, keeping your tools sharp, and working with the grain whenever possible. When cross-grain cuts are unavoidable, score the cut line with a marking knife first to sever the wood fibres cleanly. Backing boards placed behind your workpiece also prevent exit tearout during drilling or sawing operations.
Glue squeeze-out and clamp marks frustrate students aiming for clean surfaces. Control squeeze-out by applying glue sparingly and keeping a damp cloth nearby to wipe excess immediately. Place cauls (scrap wood strips) between clamps and your workpiece to distribute pressure evenly and prevent denting. When joints don’t close perfectly during assembly, resist the temptation to over-tighten clamps, which can distort the piece. Instead, disassemble, refine the joint fit, and try again.
Gap-filling becomes necessary occasionally, but view it as a last resort rather than standard practice. Small gaps can be addressed with wood shavings mixed into glue or purpose-made filler matched to your timber. Larger gaps signal underlying issues with joint cutting or assembly sequence that you should resolve in future projects rather than repeatedly disguising.
Frequently Asked Questions About Student Furniture Making
Starting your furniture making journey naturally raises practical questions. Here are answers to the queries we hear most often from students considering woodworking courses or beginning their first projects.
How much does it cost to start making furniture as a student?
Initial costs vary significantly based on your approach. Access to a shared workshop or course facility with existing tools costs between £300-800 for an introductory course, while building a basic home toolkit can range from £200 for essential hand tools to £1,000+ if you include power tools. Many students begin with course access to learn what tools they genuinely need before investing personally.
How long does it take to complete your first piece of furniture?
A simple first project like a side table or small bench typically requires 20-40 hours of workshop time spread over several weeks. In a structured course environment, you might complete this across 6-8 weekly sessions, while self-directed learners working evenings could take 2-3 months depending on available time.
Do I need woodworking experience before starting a furniture making course?
No prior experience is necessary for beginner courses. Quality instruction assumes you’re starting from scratch and builds skills progressively from basic tool handling through to completed projects.
What’s the difference between teaching myself and taking a formal course?
Self-teaching offers flexibility and lower upfront costs but requires discipline, trial-and-error learning, and tool investment. Formal courses provide structured progression, immediate feedback on technique, access to professional equipment, and the invaluable experience of learning alongside other students, which accelerates skill development considerably.
The investment in furniture making, whether time or money, pays dividends in lasting skills. Students who commit to structured learning typically produce their first quality piece within weeks rather than months of uncertain experimentation. The supportive environment of a workshop, where questions receive expert answers and mistakes become immediate teaching moments, transforms the learning curve from frustrating to enjoyable. Many students find that the confidence gained from completing that first project under guidance becomes the foundation for a lifetime of creative woodworking.
Creating your first piece of furniture marks the beginning of a lifelong journey in craftsmanship. What might seem daunting at the outset, transforming raw timber into a functional, beautiful object, becomes achievable when you approach it methodically, armed with the right knowledge and realistic expectations.
The path from novice to confident furniture maker isn’t about innate talent. It’s about deliberate practice, patient attention to technique, and learning from each project’s triumphs and missteps alike. Every piece you build, whether a simple side table or a more ambitious bookcase, strengthens your understanding of timber behavior, joinery principles, and finishing methods.
You don’t need a fully equipped professional workshop to start. Begin with essential hand tools and a modest selection of quality timber. Focus on mastering fundamental skills, accurate measuring, clean sawing, fitting joints patiently, rather than rushing to tackle complex designs. The furniture that emerges from careful, considered work will serve you for years, bearing the distinctive character that only handmade pieces possess.
Formal courses provide structure, expert feedback, and access to equipment that accelerates your learning. Self-guided study demands more discipline but offers flexibility. Whichever route you choose, commit to safe practices from day one and embrace the iterative nature of skill development.
Your first completed piece represents more than assembled wood and glue. It’s tangible proof that you can create lasting value with your own hands, a foundation for everything you’ll build next.
Leave a Reply